How to Develop Your Art Passion

Poppin' Back

  Develop Your Art Passion

Smilin’ 33″ x 24″ 2021

How do you develop your art passion? Recently on two separate occasions I was explaining my art to another person. They both lamented  that they couldn’t sew. Sewing was so hard. Yet,one person was definitely of the age of a person who had to take sewing at school. The other one was was much younger. However, she also mentioned that sewing was an impossibly hard task to do.

Where does One’s passion start?

As mentioned I can’t pinpoint when my passion for sewing started. No, my mother was not a strong seamstress. No, my grandparents were not nearby to teach me nor did they sew. Yet, I do remember begging my mother to sign me up for sewing lessons the summer after sixth grade. I don’t remember begging my parents for anything else. Okay, I did write a persuasive argument for why I needed  to have a car. Does that even count? My begging usually  focussed on not having to  do something. I have a vague memory of trying to get out of a piano  recital  that I hadn’t practiced for. Music is not a strong point of mine.

My First Sewing Classes

So my mother signed me up to take sewing classes at the local Singer Sewing Store downtown. The classes were a disaster.The teacher expected to help ladies finish their projects. Her expertice did not involve teaching the basics to twelve year olds. How to do lay out a pattern on fabric and cut it out was not in her plan. Public school teachers to the rescue! Luckily, 8th grade sewing did just that. I was on my way. Little did I know that it would develop into a lifelong passion.

Developing an Art Passion

This was the late 1960s. Girls and women were still expected to know how to sew. Yet, my older sister didn’t like it. She said she didn’t have the patience. Did I think that I was a patient person? No. I liked fashion as much as any teenaged girl did. My outfits certainly didn’t push the fashion envelope. I was not an avant garde dresser.

Developing a Skill Set

But without knowing it, I was developing a skill set. I was learning about selecting fabrics. With practice,I learned what pattern envelopes said, what they meant, and what they didn’t say. Moreover, I developed opinions about  what they should have said. I also knew I wanted to take an elective class of sewing in high school.I ended up taking the advanced class too. Who knows?Bound buttons may come back in style.

Imagine this top fluffy for the one I made

Back to the fuzzy yellow knitted top. I do remember  planning my ensembles with texture and variations  in mind. I studied my ensembles for high school.  What combinations of  outfits did I already have? What materials or colors were they in? How could I make something that would add a difference for my wardrobe? How could I add texture  and interest to the clothes I wore?

Inspired by a Tam and Scarf

Yet at this point,sewing was my hobby. Graduating a four year  college was my family’s expectation for me. I had no problems with that. I did get accepted to UC,Irvine, my first choice. My back up school was Cal Poly San Luis Obispo. SLO is famous for their home economics department. I often wonder how my life would have turned out differently if I had gone there. The closest thing to home economics at UC,Irvine was chemistry lab.

Schooling and Career

So I got a degree in History, worked on my Spanish, Master in Teaching and became an elementary school teacher. I worked passionately with second language learners for 36 years. No regrets.

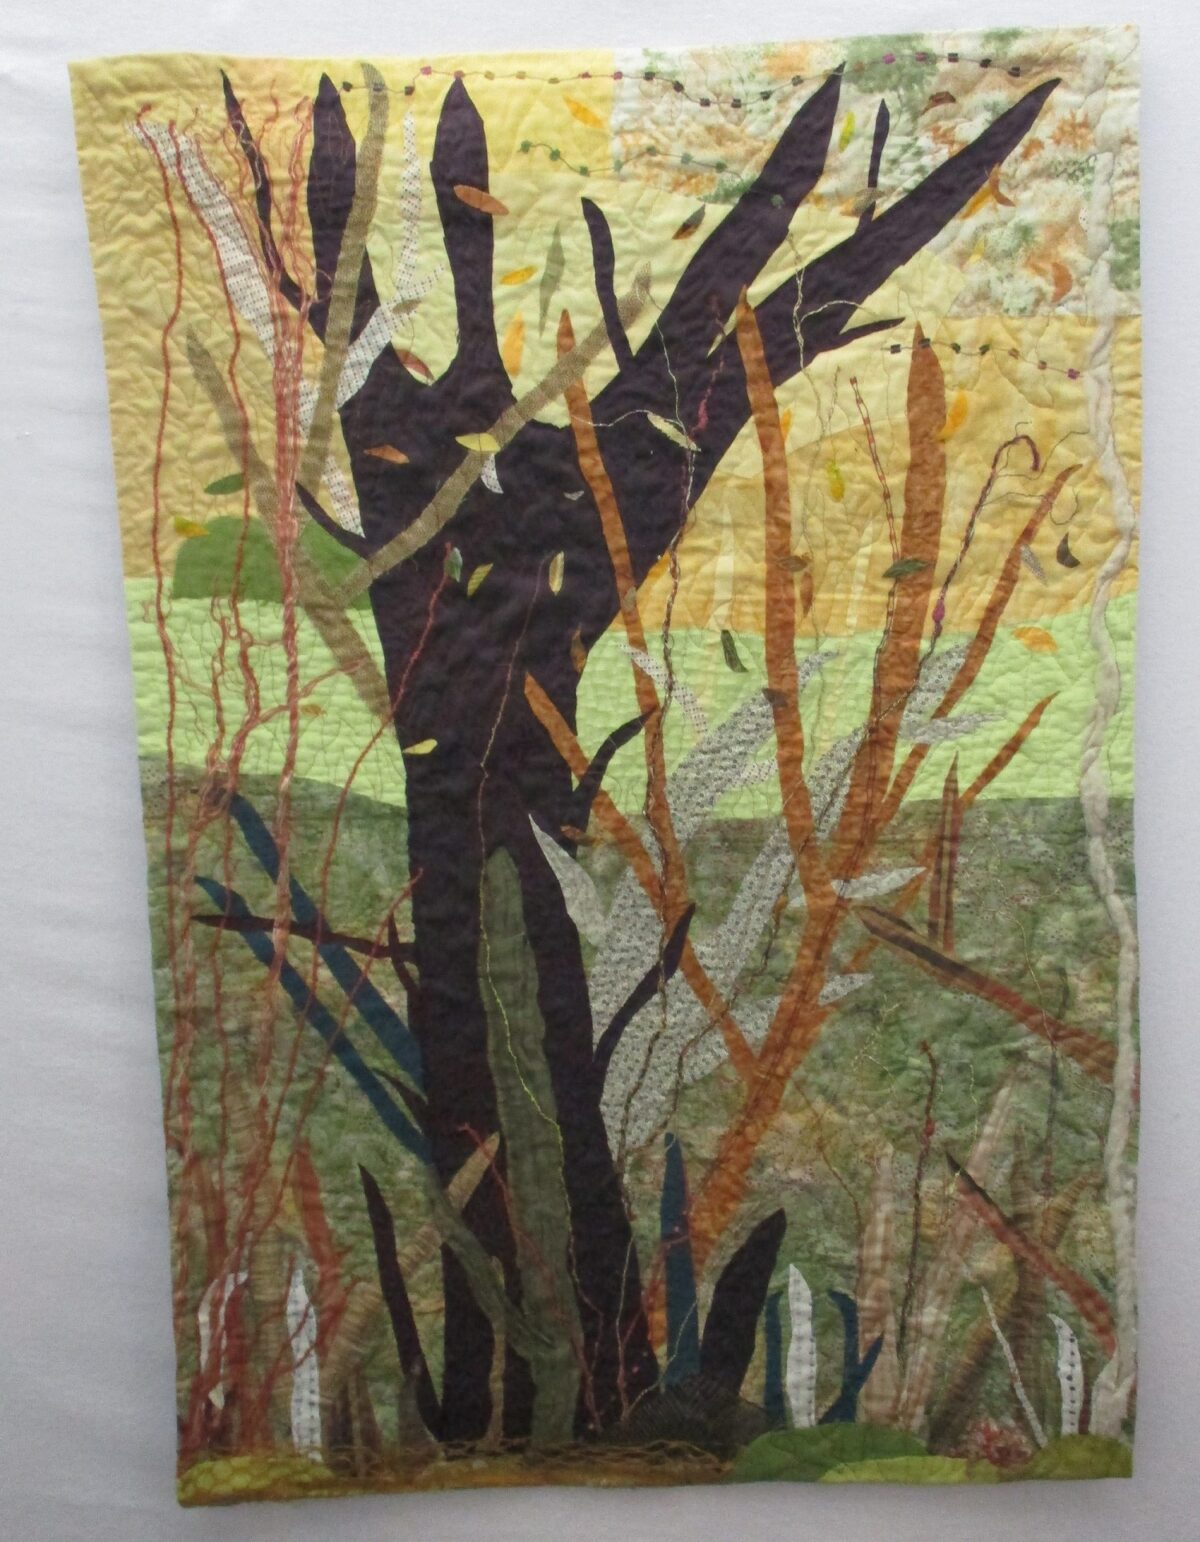
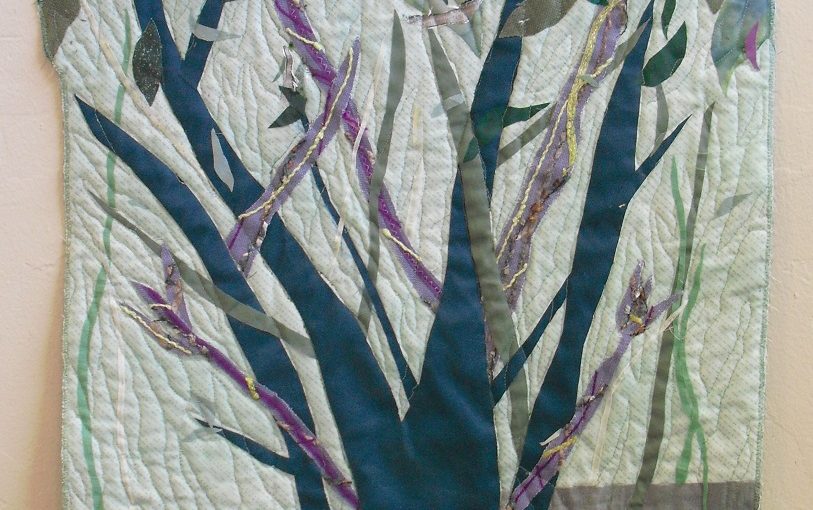
Over the years I kept sewing. I made clothes for myself and my family. I learned to  quilt and I kept quilting. Most of the quilts were for family members and donation  quilts for charities. I learned different techniques like applique and paper piecing. I stopped counting my bed quilts at 300!
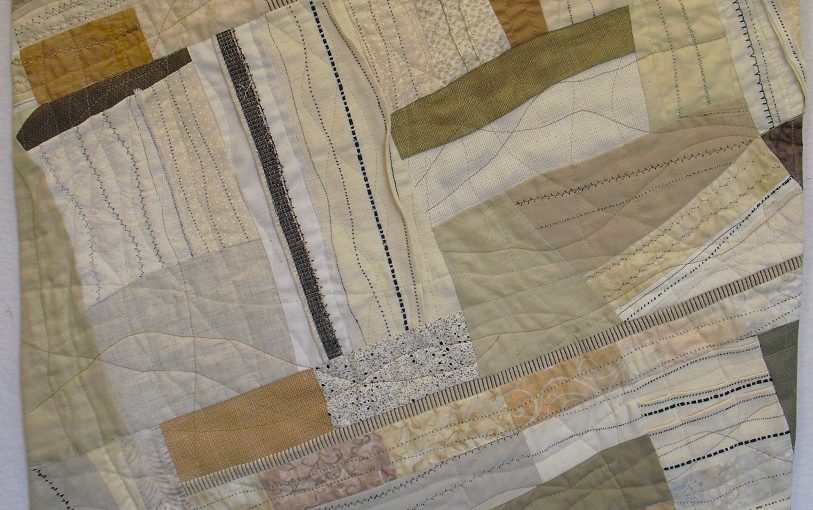
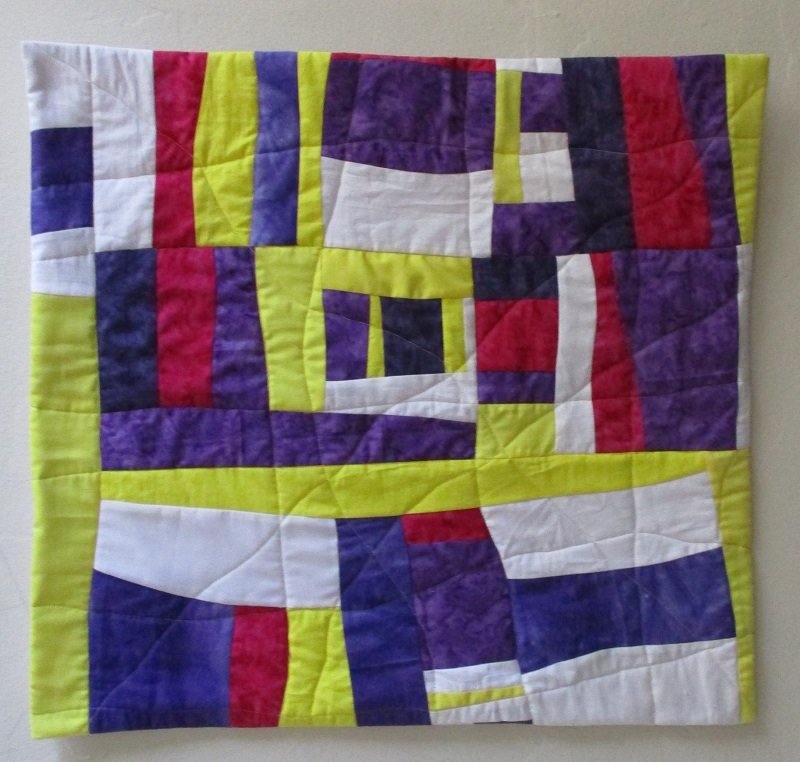
Poppin’ Back, 2021

Art Quilts

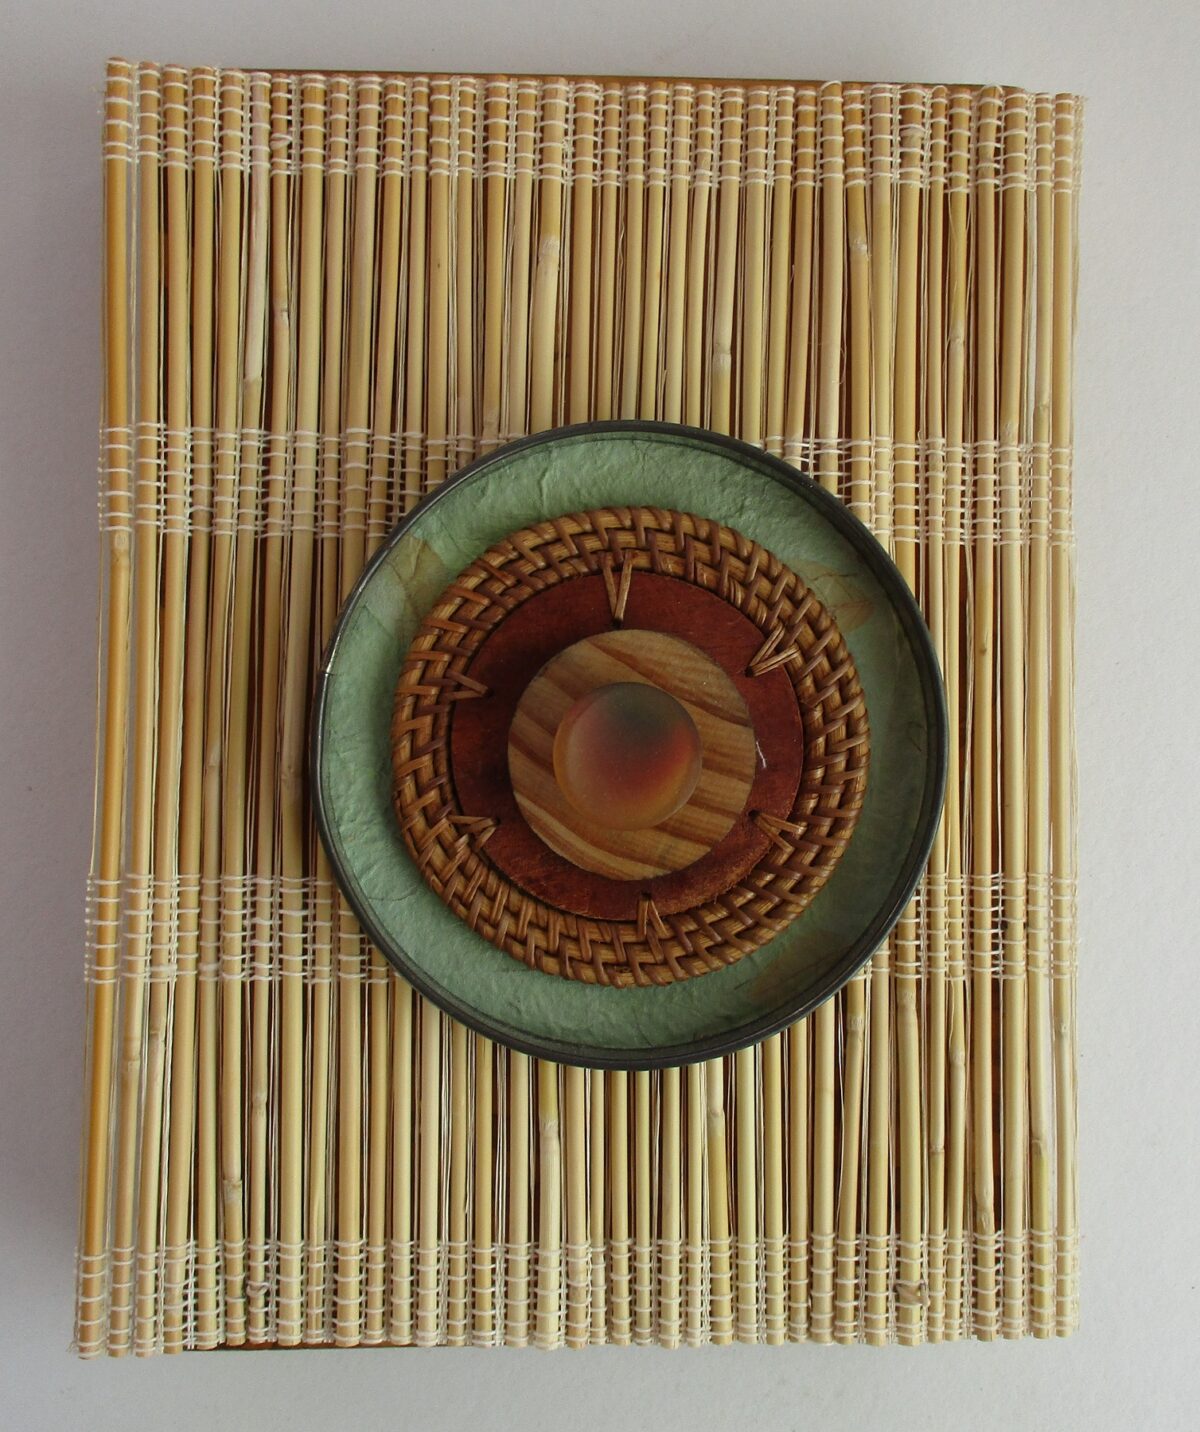
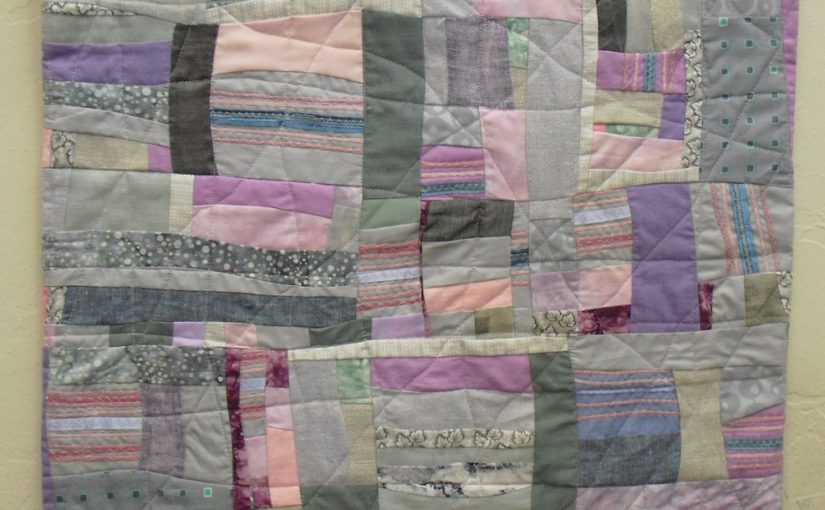
Much later I switched to art quilts. I have over 400 art quilts,large and small listed on my inventory. I learned different techniques including free motion quilting.I started entering juried art shows.Pieces sold. Practice makes perfect.Sometimes it feels good to realize that I actually know something and can comfortably do it. Do I still try new things? Yes.

Art in College

I took a year of studio art, drawing and painting in college. The teaching style in the late 1960s was totally hands off. The student was free to do their own thing. The teacher said in a positive comment that I did funny little pictures. Looking back, I realize part of my problem is that I  didn’t practice. I didn’t put in the hours to become good at it. I didn’t have the passion to keep at it to develop my skills. Malcolm Gladwell https://www.gladwellbooks.com/in his book, Outliers said it takes10,000 times to get really good at something. That sounds like a lot unless one loves doing it, has fun and is passionate about continuing.

In Conclusion

Passion! Dedication! is the answer.So much so that you will choose to stick to something  even when you get frustrated. Yet you keep going and over time you  get better and better. Maybe you will even reach an advanced skill level. At age of ten, I knew, I wanted sewing lessons. I didn’t know why. I still don’t. But sewing and the related field of quilting has stayed with me pretty much my whole life. So much so that I can only laugh when some artist says how hard it is for them. Isn’t it great that we all have different skills and talents! Find your passion and stick to it.

https://annbaldwinmayartquilts.com/2022/06/in-search-of-unusual-color-combos/

https://annbaldwinmayartquilts.com/2022/06/how-to-discover-your-artistic-signature/

How to Improve Your Next Art Quilt

Abstract Art in Fabric,
Lingering Fog, an abstract art quilt, 34" x 34", lime green,white and grey art quilt
Lingering Fog, an abstract art quilt,
34″ x 34″ 86 x 86 cm

How to improve your next Abstract Art quilt. 

Improve your next art quilt by adding color. First of all,I enjoy abstract art. Moreover,I  am drawn to bright colors and textured lines. While representative art is truly eyecatching. Nonetheless, I choose not to make art of something that someone can take a photograph of.  In contrast,my abstract art quilts highlight my mantra, Color! Texture! Movement! Similarly,the high end fabric samples from decorators inspire me to use them in my abstract art pieces.

Color

For example,here are some bold pieces using mainly commerical cottons in this abstract art quilt.

Abstract Art in Fabric,Atlas in Rose, 32" x 32", Rose pink, black and white abstract art quilt with 3D details
Atlas in Rose, 32″ x 32″
Abstract Art in Fabric,Sunset Through The Forest,34" x 32", greens and oranges with matching 3D details in this abstract art quilt
Sunset Through The Forest,34″ x 32″ 86 cm x 81cm

Meanwhile,Sunset Through the Forest has artist made details. Finally, decorative yarns to add 3D effects and texture in this abstract art quilt.

Improve your next art quilt with Texture

Furthermore,almost all of the fabrics in Desert Sands are new discontinued samples in this abstract art quilt.. To clarify,texture comes from the contrast between the silky and thicker fabrics. In addition,tucks add texture to certain fabric too.

Abstract Art in Fabric,Desert Sands,21" x 16", Calming beiges and creams in this abstract art quilt
Desert Sands,21″ x 16″
Abstract Art in Fabric,Tranquility,30" x 24",Whites and beiges with tan in this abstract piece
Tranquility,30″ x 24″

Most importantly, the monochronamic blend of fabrics, Tranquility has a calming effect. Fnally, special stitches add interest.

Improve your next art quilt with Movement.

Abstract Art in Fabric,Copper Cliffs, an art quilt, 21" x 19", Rust,cream and browns invoking  the southwest
Copper Cliffs, an art quilt, 21″ x 19″

In addition, the commercial fabric with the brown markings shouts movement. Furthermore,curved line piecing and scribble quilting adds another layer. For example, I started with this fabric. Then,I chose fabrics with similar colors.

Multicolored Blue Linen Fabric
First,I built the fabrics around this redirected piece of fabric.
Abstract Art in Fabric,Spring Break, 32" x32", blues, yellows, purples
Spring Break, 32″ x32″

Finally, it is difficult to see the top fabric in the final project,Spring Break. But it is there.

Another Example of Fabric with Movement

Here is another example of movement created by black and grey dogs on the fabric. At first, the curved lines attracted my attention. The artist in me didn’t even see the dogs. Then I couched threads on the material and cut it up. Finally,the tree branches show movement but none of the original dogs.

black grey and white fabric with green and black yarn couched yarn
Step 2 black grey and white fabric with green and black yarn couched yarn
Skyward, an art quilt made from redirected fabric with black and grey dogs on it.

In Conclusion

In conclusion,  a unique variety of  discontinued fabric samples inspire me to create my abstract art quilts. Finally, I aim to include color, texture and movement in each of my abstract fabric art pieces. Thank you for letting me share some of them with you.

Read more information that may be of interest to you.

https://annbaldwinmayartquilts.com/2017/10/step-by-step-instructions/

https://annbaldwinmayartquilts.com/2019/08/making-of-an-abstract-art-quilt/

https://annbaldwinmayartquilts.com/2018/05/an-abstract-work-in-progress/

https://annbaldwinmayartquilts.com/abstract-art-quilts/

https://www.etsy.com/shop/annbmayartquilts/

Scared to try Something New? Follow my Recent Attempts at Assemblage

Piece made in class ,2018

Recent Attempts at Assemblage

Recent attempts at assemblage came about from my interest in  fiber and 3D objects.  Sometimes it can be scary to try a new direction. Moving in a new direction is something that I generally do very slowly.The assemblage art form utilizes found objects that appeal to my deep sensibility for using redirected or upcycled materials. I had been adding 3D found objects to my art quilts since the beginning of my art career. The time came for me to further my skills by taking a class on assemblage. If I can try something new, so can you.

Under the Beautiful Redwoods-2018

Back in the Fall of 2018, I participated in an assemblage class taught by local artist, Janet Silverglate. The day long class met at her house outside under the beautiful redwoods of Felton, California. She introduced us to many new materials and skills. She was generous with both of them. Practicing with an electric drill was a new experience for me. The class learned the importance of working backwards on each piece. Figuring out how to hang or display the piece was one of the first necessary decisions to be made.

The Piece I made in Class

This is the piece that I made. I contributed the fiber background and the metal rim. Janet graciously offered the other  parts including the green paper, and large button on the top. She also helped with the process of adjoining all pieces together that I was having trouble accomplishing. While I am pleased with the finished product, I recognize  that I had a lot of help.

Brown and green circles on fiber background
Piece made in class,2018

I thoroughly enjoyed the day completing my first assemblage piece. As with many beginners, I was in awe of the teacher’s skill and proficiency. She had a large room full of materials that she had gathered. I could relate to that process. I also gather materials without considering their future use.  However, due to a lack of extra space,I  wanted to restrict myself to the materials that I already had. I couldn’t imagine gathering materials for assemblage projects as well as a wide variety of materials for art quilts. Luckily, my inheritance supplied me with a variety of interesting items I could use.

Several Recent Attempts at Assemblage

I took  a long while before I felt the creative juices flowing to try something on my own. Maybe the shelter in place helped in that regard. My thoughts were also that a successful piece begins with an interesting framework or support system. I  was waiting to find a worthy object.

My husband supplied me with a wooden drawer from a small piece of furniture of his mother’s. The drawer was from some sort  of a sewing unit. It had a wooden tray that originally was used to store thread and small items. I turned the tray on its side.

Making Decisions

My inheritance included many sewing items. I found the idea of covering the edges with fabric measuring tape appealing. First, I added screw in hooks to the top for hanging. Then  I glued the fabric measuring tape to the sides.  Here are some of my other first choices.  I moved the buttons around. Eliminating some of the sewing items creates a more general audience appeal.

Trying out ideas with lots of sewing items,spools yarn, small plastic animals for fun
Trying out ideas with lots of sewing items
Highlighting the measuring tape glued on the side.

Trying Different Things

Numerous attempts were  made before settling on this final arrangement.  I had many empty wooden spools that I wanted to use. Yet, previously I had noticed the lack of color in other people’s empty spool projects.   I preferred the addition of some thread color. Luckily, my mother and mother-in-law had left me many sizes and choices of colors. Whimsical animals add fun as well as color!

Wooden Spool Assemblage,2020, spools some empty and some still with thread
Wooden Spool Assemblage,2020

Another Recent Attempts at Assemblage-A Wooden Spool Wreath

For a long time I looked  for inspiration on what I could do with my empty  wooden spools. I did have a lot of them. Finally I saw a unique wreath that inspired me to try to make a wreath using them. I happily found red beads to alternate for a holiday look. The framework is a fiber paper plate holder. It is turned upside down so that it will lay flat against the wall. I  found a metal clip with a circular ring that I had. It attaches like a clothes pin. How easy was that!

Recent Attempts at Assemblage,Wooden Spool Wreath,2020  burlap bow
Wooden Spool Wreath,2020

How to String the Spools

I bought several sizes of  small width dowels to see which size would fit best. I chose the smallest one possible, less than 1/4″ wide to string the spoons and beads on. At first I tried to have all lengths equal. But I broke a dowel so I had to make do. I think that the different lengths are actually an improvement. Mistakes can be good. The tiniest dab of glue  holds each bead and spool in place on the dowel. I repurposed a burlap bow I had received on a recent gift. How serendipitious was that! The finished product hangs in my studio window.

Black Lives Still Matter

Recent Attempts at Assemblage,Black Lives Matter Decoration,2020 red,white and blue ribbons
Black Lives Matter Decoration,2020

What would 2020 be without a sincere homage to Black Lives Matter! I made several similar pieces using patriotic red,white and blue ribbons. On the white part of the ribbons, I wrote A Violation Should Not Be A Death Sentence and Black Lives Matter. It has been obvious to  me for years now that black people were shot and killed rather than just arrested or ticketed for a violation. Now another  variation piece has Equal Rights For All written on the ribbons.

Recent Attempts at Assemblage,Indigenous Inspirations, 2020 a fiber pape plate hold with red beads and feathers
Indigenous Inspirations, 2020

In conclusion, this year of Shelter in Place gave me the time to set aside any fears that I may have had about trying something new. Recent attempts at asssemblage helped me develop my new portfolio. Thanks for letting me share them with you.

https://www.etsy.com/shop/annbmayartquilts/

Check out Janet’s work.
https://www.janetsilverglate.com/

https://annbaldwinmayartquilts.com/2021/01/first-steps-towards-assemblage/

https://annbaldwinmayartquilts.com/art-quilt-galleries/assemblage-3d-collage/

https://annbaldwinmayartquilts.com/2021/03/beginning-steps-to-creating/

Out on a Limb?Trees in Art Quilts

Old Orchard, 48" h x 34" w, an art quilt, $4900.
Vacant Lot, 43″ x 31″ 109 cm x 79 cm,$4900.

Trees in Art Quilts

First of all,trees in art quilts are my most popular pieces.Everyone loves trees. Above all,everyone can relate to the shape and various colors of trucks and leaves. Vacant Lot, is an early example  of one of my tree art quilts. Furthermore,five  of my art quilt  trees hang in local Santa Cruz County Kaiser Permanente Medical facilities.

Tree Friendly Town

I live in a tree friendly town. That is to say that Santa Cruz, California is part of the Tree City USA program. My county is full of fruit tree orchards as well as redwoods. Furthermore,the Spanish explorers saw their first redwood tree in Santa Cruz County. In addition, California’s first state park, Big Basin is also in my county. That is a lot of trees  for the second smallest county in California.

Of course,many locales are tree friendly places even if they not they are enrolled in the national urban tree program. We can all relate to trees and leaves; the forms they take and  the shapes they make. Creating trees lets me explore and expand my use of texture, color, and movement. Let me take this opportuntity to share my love of trees.

Adding Color

Young children and other people know what color a tree should be. We understand the general shape of a tree including the wide variety of sizes and forms. Adjust the color of a tree  to an  unnatural  color. Our brains will still recognize that it as  a tree. This is what makes it fun for  an artist.

Red tree on a white pieced background, Palo Colorado,34" x 32" 86cm x 81cm
Palo Colorado,34″ x 32″ 86cm x 81cm

Red and White Challenge

In 2013, my local quilting guild had a Red and White Challenge. Participants receive certain fabrics that must be used. Notice the red and white polka dot fabric. Additional fabrics and details were encouraged. I placed the red tree, Palo Colorado on a background of various pieced white fabrics with red hand stitching for accents.

Green teal tree with multicolored leaves falling 
Along the Path,34" h x 22" 86cm x 56cm
Along the Path,34″ h x 22″ 86cm x 56cm

Teal colored tree trunk and branches ? Not so common,nor are violet branches. I have received such a positive response from the movement of leaves extending beyond the edges of the art quilt that I have continued to do that.

At the Edge of the Grove,29"h x 26" 74cm x 66cm Orange and white tree on a deep green background
At the Edge of the Grove,29″h x 26″ 74cm x 66cm

What could be more fun than orange branches!

Trees in Art Quilts,Tree Along Creek,32" x 27" 81 cm x 69cm  Light green tree with leaves falling on a dark green background.
Tree Along Creek,32″ x 27″
81 cm x 69cm

This tree along the creek has  pale colored branches  with  bluish green tint from couched yarns and decorative threads. The pop of medium green comes from a piece of  dress fabric from the 1940s.

Adding Texture

Celebrating Fall has branches made from a highly textured yet, loosely woven fabric. I couched decorative threads are on top of the fabric to add more interest. This same couching technique is also visible in Tree Along Creek and At the Edge of the Grove.

Trees in Art Quilts, artist decorated tree branches brown and fall colors Celebrating Fall,33" x 31" 84cm x 79cm
Celebrating Fall,33″ x 31″ 84cm x 79cm

Adding Movement

In Looking up at Dusk,flying leaves and twigs are carried along by  the wind. While creating this piece, I actually toss some pieces onto the quilt top. Great fun! Great serenpidity!

Looking up at Dusk,31" x 24"
79cm x 61cm Golden background with green branches on top
Looking up at Dusk,31″ x 24″
79cm x 61cm
Green and white tree with a white fence on a hill with rocks. Red owl is in the tree.Overlook,35" x 26" 88cm x66cm
Overlook,35″ x 26″ 88cm x66cm

In Overlook, I choose a green and white patterned fabric for the trunk and branches. I couched decorative threads and yarn to the fabric before cutting out the shape of the tree.  The white  spaces on the fabric create movement. The curvy line quilting in the sky also adds action. The sky fabric is from an indigo dying class. Can you see the clouds moving across the sky?

Conclusion

My art is all about Color! Texture! and Movement! Tree art quilts are a perfect theme for me to showcase this mantra. Repurposed decorative threads and yarns are a natural fit as well to add more texture and movement.

https://www.etsy.com/shop/annbmayartquilts/

https://annbaldwinmayartquilts.com/marine-melodies-2/?wppa-occur=1&wppa-cover=0&wppa-album=6&wppa-photo=306https://annbaldwinmayartquilts.com/nature-art-quilts/

I use  the fabric layering technique to create my trees. You may be interested in reading more.

https://annbaldwinmayartquilts.com/2020/03/fabric-layering-technique-another-look/https://annbaldwinmayartquilts.com/2017/07/fabric-layering-technique/

New Kind of Talk-Pechakucha Laser Talk

Spring Break, 32" x32", $695.
Pechakucha laser talk
Spring Break, 32″ x 32″

Pechakucha Laser Talk

First of all,I prepared this Pechakucha laser talk in anticipation of presenting it at an art quilt meeting. The Pechakucha,a Japanese word for chitchat. To clarify it is a format that gives a speaker a limited amount of time to discuss a topic. For example, I would have 4 minutes to present a limited  number of photos to on one topic. At the same time,numerous presenters of a variety of topics are able to share.  That is to say that I prepared to discuss my passion for making art quilts from redirected materials.  Moreover,FABMO, a local nonprofit is where I get my materials from. http://fabmo.org

My Art Quilt World

To begin,I do nature art quilts, abstracts and Mexican inspired fabric collages. Furthermore, I am very passionate about using redirected materials and threads to keep them out of the landfill. My inspiration comes from the materials I find at FABMO . I have been a volunteer there for many years. To clarify,I  brought photos from three pieces that I completed recently to present at this Pechakucha laser talk. So I could share the process with you.

Spring Break, an art quilt

Blues , greens and light colors on a piece of linen,Pechakucha laser talk
Paisley pattern on linen

First I choose the fabric, Here is the material  I started with. I liked the variety of color and decided to use the colors as a basis of an abstract art quilt.

green and blue pieces of fabric on a design wall,Pechakucha laser talk
Step 1 Beginning to place pieces on the design wall randomly

Next, I couched decorative threads and yarns with the idea of making interesting details. Then I cut up the strips randomly to use as fabric.  Following that trying out other fabrics on the design wall.You can see several examples of redirected couched ribbon and yarn on different colored fabric.

Blue, yellow and green fabrics with ribbon and yarn couched on it,Pechakucha laser talk
Pechakucha laser talk

Finally,the completed piece using scribble quilting. Scribble quilting moves the quilt side to side while quilting to create flowing lines of sewing.

Skyward, an art quilt

grey and black dogs,Pechakucha laser talk
Greyhounds
Black and grey dogs on a white background,Pechakucha laser talk
Greyhounds in another direction

Originally, I chose this FABMO fabric for the movement and stark lines. But when choosing the fabric,I didn’t even noticed the dogs. They were not of interest for me. First,I began to couch green and black threads.

Redirected yarn is couching on the black and white material,Pechakucha laser talk
Here, I zigzagged a variety of colors.

Then,I continued  couching other  colored threads.  Some of these threads were light blue but read more like grey against the light grey part of the fabric.

Black and white fabric cut into form branches on a blue sky ,Pechakucha laser talk
Can you believe that the tree is made from the same material?

Finally, I was ready to use the fabric to create tree branches. Using the fabric layering technique,I laid the back fabric down on the table.Of course the back is also another piece of material from FABMO. I covered it with batting and I laid an indigo dyed piece on top for  the sky background.

Completed piece of black and white branches on a sky blue background.Pechakucha laser talk
The finished art quilt just showed the tree tops.

The finished piece,Skyward,succeeds in its interplay of light and dark on the branches. On the other hand,one doesn’t notice the dogs at all.

Under the Shady Tree, an art quilt

A leafy tree leans over a fence.
The finished art quilt, Under the Shady Tree made from redirected materials.

Next is the finished piece of under the Shady Tree.  Aficionados of redirected materials may recognize the fence fabric. To clarify, I used the fabric layering technique.

Tree branches with leaves fallingPechakucha laser talk
Unusual materials can be used in unique ways.

Furthermore,notice several leaves with bluish and gold colors. To be clear,I used a multicolored synthetic knit that kept rolling up in other projects. I couched it to help it lay flat. Then I cut it into leaves.

tree branches against a beige background
a different view

Last but not least,Shiny sheer fabrics add interest.

Multicolored threads around the base of the tree,Pechakucha laser talk
Take apart details and see what interesting fibers one can find.

Creating Texture

Moreover,texture is created by taking apart fabric details. They can be used as bunches of threads to add interest. One can also find decorative threads,ribbon and small cording . Lastly, I laid it on the foreground , covered it with tulle netting and free motioned quilted the three layers together.

To sum up,I am all about color, texture, and movement which I create using redirected materials. Thank you for letting me share some of my recent works with you.

In conclusion, learn more about these techniques.

https://annbaldwinmayartquilts.com/2020/03/fabric-layering-technique-another-look/

https://annbaldwinmayartquilts.com/2017/04/wacky-fun-quilting-again/

To learn or refresh your memory about this all volunteer organization you may read the following article.
https://annbaldwinmayartquilts.com/2017/12/the-amazing-stor…a-big-difference/

https://annbaldwinmayartquilts.com/2019/12/coming-into-my-own-as-an-art-quilter/

http://annbmayartquilts.etsy.com/

https://annbaldwinmayartquilts.com/2018/11/use-redirected-fabric-in-art-quilts/

https://www.etsy.com/shop/annbmayartquilts/

See A New Abstract Art Quilt Work in Progress

Winter Sunset greys,pinks and purple fabric in this abstract art quilt.

Abstract Art Quilt Work in Progress

An abstract art quilt with lavander,pink, and grey colors
Winter Sunset, An abstract art quilt with lavander,pink, and grey colors,the finished piece

Abstract Art Quilt Work in Progress, Winter Sunset

This work in progress shows the steps I follow to create an abstract piece of art. Designing my abstract art quilts begins with choosing a group of colors. Inspiration for this quilt came from the greys and pinks of a winter sunset. I pick the decorative threads that I want to work with. I choose fabric that fits into the shades of colors that I chose. This time I want the colors to blend together and hardly be noticeable. Look for the green marbled fabric I added for that purpose. Choosing mnaterials from my stash is my favorite part of the creaive process.

An abstract art quilt with lavander,pink, and grey colors
1. Yarn and decorative threads for couching.
An abstract art quilt with lavander,pink, and grey colors
2.I begin to choose fabrics.

Couching Decorative Threads and Yarns

Couching decorative threads and yarns to a long strip of fabric is fun. I  use little pieces that might otherwise be thrown away. Each person’s eyes will blend the colors together differently. Then I randomly cut up the strips to use as fabric. I place the fabric on the design wall. Then I move the pieces  around until I like it.

An abstract art quilt with lavander,pink, and grey colors
Long strips of cotton with the threads couched on them.
An abstract art quilt with lavander,pink, and grey colors
I cut up the long strips. They are ready to be used as fabric.
An abstract art quilt with lavander,pink, and grey colors
I place them on my design wall.

Keep Colors and Textures Balanced.

Beginning  to sew the pieces together, I  keep my eye out  to make sure that the balance of the colors and textures is good.

An abstract art quilt with lavander,pink, and grey colors
I start to add the other fabrics.
An abstract art quilt with lavander,pink, and grey colors
8. I added more fabric.

I keep adjusting the fabrics adding and subtracting fabrics as I go. Until I get it just right in my eye’s mind.I begin sewing small pieces together.

An abstract art quilt with lavander,pink, and grey colors
I sew more pieces of fabric together.

I continue sewing pieces pieces together. Here you can tell that the pieces are getting larger.

An abstract art quilt with lavander,pink, and grey colors

I moved some other pieces around. Sewing together continued. I finished sewing or piecing the top together.. The quilt sandwich has the top, the batting and the backing fabric pinned together to quilt.

An abstract art quilt with lavander,pink, and grey colors
done

I use my wacky fun scribble quilting technique to quilt the three layers together  creating an added level of movement. Scribble quilting is a technique I named. I  move the quilt side to side while quilting with a walking foot.

An abstract art quilt with lavander,pink, and grey colors
Winter Sunset, An abstract art quilt with lavander,pink, and grey colorsthe finished piece

You may be interested in reading more at Studio Art Quilt Associates (SAQA) website.

http://www.saqa.com/

https://annbaldwinmayartquilts.com/2021/06/abstract-art-in-fabric/

https://www.etsy.com/shop/annbmayartquilts/

Challenge Yourself!Having Fun With Color!Texture!Movement!

Along the Path

Having Fun With Color!Texture!Movement!

Having Fun With Color!Texture!Movement! appeared in Art Quilting Studio, Summer edition, 2018. Ann Baldwin May is having Fun With Color!Texture! Movement! in each of her art quilts.

https://annbaldwinmayartquilts.com/press-coverage/

fabric teal colored tree with leaves falling and rocks at foot of the treeFun With Color!Texture! Movement!
Along the Path
Fun With Color!Texture! Movement!
detail,Along the Path, art quilt

Having Fun With Color!Texture!Movement!

Having Fun With Color!Texture! Movement! will show the steps  needed to add color,texture andmovement to art quilts using the fabric layering technique.

Having Fun With Color!Texture!Movement!
GETTING STARTED

The fabric layering technique makes it easy to have Fun With Color!Texture! Movement! to your art quilts. Begin by laying the back cotton fabric on a table. Choose a size that will easily fit on your work table.  A square or rectangle about 15”-20” is a good start. Press the fabric to lay flat. Cover with batting which should also lay flat. Don’t worry if the edges don’t exactly line up, they will be trimmed later.  Next, choose a fairly neutral background fabric or fabrics. Overlap the fabrics about an inch. If the fabrics shift during quilting, the batting won’t show. Cut a meandering line to look  like rolling hills on the edge of the top fabric. Lightly baste with a glue stick.

Choose your Colors Having Fun With Color!Texture!Movement!

Fun With Color!Texture! Movement!
detail of Along the Path

Choose your colors adding a range of hues from light to dark as well as colors that contrast. Play with the colors to see what you like. Be ready to eliminate those that really don’t work.  Go for an impressionistic view rather than a picture perfect trunk, leaf, or branch. Each viewer’s eye will blend the colors uniquely.

Start Large to Small

When beginning to create the scene, start with the largest part and work to the smallest. Cut out the tree trunk and add branches as you go. Flip the fabric and use the backside to add dimension. When you have the tree the way you like it, lightly baste. Just baste in a few places not all over. Later on, if you  may want to slide a branch underneath and  you won’t be able to  if it is totally glued down.

  Add Details Having Fun With Color!Texture!Movement!

Add rocks to the foreground. Choose fabric that will work for you to add texture. Avoid fabrics that have rocks printed on them. I chose marbled fabric I bought at Pacific International Quilt Festival and a redirected fabric to add texture. You will notice that they are cut simply.  Lightly baste the rocks to the background.
For the medium sized branches, I couched (zigzagged) decorative threads and ribbons on to a multicolored piece of redirected linen. Then I cut the branches out. I lay them on the piece balancing out the colors. Crossing branches adds interest and movement. Keep going until the scene is pleasing to you. Baste lightly.

Along the Path,detail

Leaves Add Interest

Working on the leaves is so much fun. Gather contrasting and blending colors. Make the leaves about
3”-4”   varying the shape and size. Small scrap pieces are all that are needed. Pay attention to balancing the placement of the colors . Reflective, shiny sheer fabrics add a pop to the leaves. Save them for the top for the greatest effect. If you choose to have the leaves stick out from the edge, make those leaves  ½” bigger for ease of zigzagging. During the final trimming you can adjust the leaf lines by cutting  before zigzagging. Lightly baste leaves in place. Your art quilt will also be successful if you decide to make the edges straight .

The Beginning of the End

When your artist’s eye says that the scene is complete, cover with tulle. Make sure that the tulle is 2 “ longer on all sides. It can pull  a bit during quilting. Pin the tulle down making sure that it is flat but not stretched.  Use a lot of straight pins; remove as you quilt. As with other quilting techniques, begin in the middle of the piece and quilt outward. Edges may be rolled to accommodate the machine’s space.

Helpful Hints

Beginners will have success stitching along the edges of the branches, following the lines of the fabric. More experienced quilters can add movement by quilting lines resembling slanting plants. Choose a thread color that blends with the background.  I highly recommend Aurifil  thread for successful free motion quilting. Trim the edges and zigzag two times. Press lightly with a pressing cloth or piece of fabric. Add a sleeve to the back to hang. Stand back and admire!

Everyone Starts Somewhere.

Several years ago I began my path from traditional quilts to art quilts. I took a class in the fabric layering technique from the award winning, Meri Vahl (meriartquilts.com). Meri had learned the technique from Northern California artist, Laura Fogg(laura-fogg.squarespace.com).The technique  allows for  much personal creativity; none of our work  looks similar. I was inspired to create a tree with leaves overflowing the edges as I have sold five pieces to the new Kaiser Permanente Facility in Scotts Valley and WEatsonville, California.   A change in color scheme keeps all of my trees unique.

Important Materials

quality scissors; large and small, sewing machine, darning /free motion foot, walking foot for zigzagging, rotary cutter, cutting board, plastic see through quilting ruler, cotton fabric for backing, tulle, synthetic fabrics, redirected materials, commercially marbled fabric, sheers, batiks, Aurifil thread,  Avery glue stick, pressing cloth ( to protect tulle and synthetics from melting when being pressed),a pointed wooden stick , straight quilting pins(They are longer than sewing pins.)

Tips

  • Leave a 1-2” empty back ground space on the sides of your piece. Then when trimmed your art doesn’t lose any interesting parts.
  • A light colored tulle will be best for your first project. I personally am not fussy about the color of tulle I use.
  • This technique is a forgiving way to practice free motion quilting. Before I learned this technique, I was ready to give up with free motion quilting in frustration. Lower or cover your feed dogs. Put your stitch length at 0. Use the darning/free motion foot with Aurifil thread. Push foot pedal control fast while slowly moving/quilting the layers of fabric.( Fast foot ,slow hand) Aurifil thread is available at most quilting stores. It appears more expensive but it really isn’t.  I pieced and quilted a queen sized quilt of many seams with one spool.
  • Throwing the leaves onto the scene adds movement. Free yourself from cutting out perfectly formed leaves.
  • Use a large straight pin like a hat pin to get the tiniest dab of glue on the tip and gently slide under the fabric to be basted. I use a wooden stick similar to an emery stick to help me gently nudge the pieces of fabric to where I want them to be.

Advice for Beginners

I come from the world of  bed quilts. The basic sewing skills used in traditional quilting are fundamental for most art quilting. However the “Quilting Rules” can be left behind. Buying patterns, pressing seams and matching seams are a few of those rules I have freed myself from. Give yourself permission to try something new, be it a color combination or creating your own designs. Listen to yourself. Take baby steps. You decide if you like your work or not. If not, change it. There is no wrong way to do it. Many art workshops or seminars begin with activities to get people in touch with one’s creative side.

Along the Path
Along the Path

About the Author

Ann Baldwin May lives in Santa Cruz, California. In 2012, she retired after teaching elementary school for 36 years. She began quilting in the 1970s. Ms. May participates in the juried Santa Cruz County Open Studios Art Tour from her studio in the Santa Cruz Art Center. She recently sold five tree art quilts to Kaiser Permanente for their facilities in Santa Cruz County, California. May is a member of SAQA( Studio Art Quilter Associates). Contact her at baldwinmay49@yahoo.com or www.annbaldwinmayartquilts.com. Or visit her Etsy shop at https://www.etsy.com/shop/annbmayartquilts/

https://annbaldwinmayartquilts.com/2020/01/creating-movement-in-abstract-art-quilts/

https://stampington.com/art-quilting-studio-summer-2018/

Do you know Cindy Grisdela,art quilter?

CindyGrisdela, art quilter

Read this interview about Cindy Grisdela,art quilter by Studio Art Quilt Associates(SAQA) too good not to share.

CindyGrisdela, art quilter
Art Quilter Cindy Grisdela


CindyGrisdela
JourneysEndDetail-CindyGrisdela

SAQA: When did you begin making art with fabric? Do you work in other media as well?

GRISDELA: I started sewing when I was 10. My mother decided I was old enough to be trusted with her beloved Singer. I studied art in high school and college experimenting with painting, drawing, ceramics, sculpture and weaving.I made my first quilt in 1983. After seeing an article in a magazine of a queen size Trip Around the World, I wanted to make one. After that I was hooked.  I spent a number of years making traditional quilts as a creative outlet while I raised my family. About 15 years ago, I got bored with following patterns. So I started seriously trying to make my own art in fabric.

Color and Texture

SAQA: What inspires you?

GRISDELA: I’m inspired by abstraction, color and texture. I enjoy playing with color and seeing how various colors and shapes interact.  One of the reasons I create with fabric instead of with paint is the ability to add another dimension to my compositions.  I can add  texture with dense free motion quilting. The stitching is an integral part of the composition. It is not just a means to hold the three layers together.

SAQA: Have any artists or art movements influenced your work?

GRISDELA: I have a degree in Art History.  There are always lots of influences rattling around in my head. I love Abstract Expressionism, especially the Color Field School of artists. Matisse’s cut outs are important to me, as are Klee, Kandinsky and Klimt. I’m also drawn to the work of Robert and Sonia Delaunay. Among quilt artists, I am indebted to the work of Gwen Marston who was an early influence.

SAQA: What techniques and materials do you use?

GRISDELA: I use hand dyed fabrics to create almost all of my current work mostly by Cherrywood Fabrics. I experimented with dyeing my own fabrics a number of years ago, but realized that’s not my skill. So I’m happy supporting others who do it well.All of my work now is created using improvisational piecing techniques and free motion quilting. I enjoy the dialogue that happens when I’m just cutting out colors and shapes intuitively. One decision leads to the next. It’s a little like putting together a jigsaw puzzle. Only I get to decide what the picture is going to look like. I do all my quilting without marking ahead of time or using a computer program.

A Lakeside Studio

SAQA: Where do you create?

GRISDELA: I have a studio in the basement of our townhouse. I look out on the lake while I’m sewing.  It’s a very peaceful retreat. The commute downstairs is great too! I also have a shared space with nine other artists a short distance from my home. I’m the only fiber artist in the group. But it’s good to be around other creative people and share inspiration. I try to spend one day a week there.

Artmaking and Business

SAQA: How do you reconcile the artmaking and business sides of your creative life?

GRISDELA: That’s the tough part. For the last ten years I’ve been traveling extensively showing an selling my work at fine art and fine craft shows all over the country. I do about 12-14 shows a year. I also have an active blog and presence on Instagram and Facebook.  I’m a regular contributor to the SAQA (Studio Art Quilter Associates)Journal.

I spend about half my time on the business side. This entails writing, applying to shows, keeping my website up to date, marketing, and other business. I like to spend time in the studio in the morning and early afternoon. That’s when I’m most creat I work on other business later in the day. I  keep lists and work backward to make sure enough time is allotted to keep my inventory up for the shows. Sometimes I’m writing blog posts or marketing pieces on the road.

Publications

SAQA: Have you published books or been a guest on an art-related media program?

GRISDELA: My new book, Artful Improv: Explore Color Recipes, Building Blocks & Free Motion Quilting, was just released by C&T Publishing in October 2016. It’s a friendly guide to creating your own original art quilts without a pattern, using simple design principles and improv techniques.

What’s next?

SAQA: What are you working on now? What’s next?

GRISDELA: I will continue doing shows.  Probably not as many as I did in 2017.  I’m doing a lot more teaching now to promote  the book. It’s such fun to see a diverse group of artists come together for a day or more to explore their individual creativity. Each person’s work is different from the others and different from mine.  We all bring our own personalities and backgrounds to the table.

I also have plans to work on a new series of larger improv quilts. The great thing about improv is there’s always something new to explore!

View more of Cindy Grisdela’s work on her website and SAQA Juried Artist Member profile

https://www.cindygrisdela.com/

Connect with Cindy Grisdela on Facebook and Instagram

Follow Cindy Grisdela on Twitter and Pinterest

http://annbmayartquilts.etsy.com/

https://annbaldwinmayartquilts.com/2018/07/a-world-of-fiber-art/

Discovering New Stitches

Tranquility with black stitches pulled through to the front before quilting.

New stitches can be found by accident. Mistakes can sometimes lead to a wonderful realization or improvement.

Discovering New Stitches by Mistake

Discovering New Stitches by Mistake, Tranquility, a pieced beige and brown art quilt
Tranquility, an art quilt with black stitches pulled through to the front before quilting.

The Tension was Off.

Tension is the balance between the top threads and the bottome threads on a sewing machine.A while back my 20 year old Huskavarna Lily was acting up. Out of the blue, the tension would change as I was sewing. The action pulled the bobbin thread through to the front (top) of the fabric. As annoying as this was, I liked the way the stitches looked. I was discovering new stitches quite by accident. Could I repeat the success of this stitch ?

Let me confess, that I am not a person who often uses all of the stitches that are available on my machine. I usually use the  zigzag stitch and one or two decorative stitches. I decided to fool around. How could I could use this “accidental stitch ” to my advantage? I wanted to  discover new stitches by mistake. Would it be a way to add interest to my art quilts?

Changing the Tension

I changed the tension to 8 or 9 high on my machine. with a black thread in the bobbin. The top thread I used matched the white or beige color of my fabric. At the time, I was doing Native American inspired quilts. Moreover,I felt the black dots on the top somehow seemed to work for me. The maximum contrast drew my attention. I also adjusted the stitch length and width  to make them as large as possible for maximum visibility. The results were pleasing.

In conclusion,errors can turn into serendipitous wonders if we keep our minds open to them. In the future, I should be more adventuous to change the tension and adjust more of my machines stitches.

https://annbaldwinmayartquilts.com/2020/01/creating-movement-in-abstract-art-quilts/

https://annbaldwinmayartquilts.com/2021/02/the-making-of-an-abstract-quilt/

http://annbmayartquilts.etsy.com/

<1001centerstreetsantacruzca>