How to make a Quilt without a Pattern

Making a quilt without a pattern may sound easy and appropriate for a beginner. However, it is not. First of all,this post assumes that the person has basic quilting skills and materials. As always,choose 100% cotton for ease of sewing and washing. Use a quilter’s cutting board, quilter’s straight edge and rotary cutter. I prefer to use a generous 1/4″ 1 cm seam when sewing.Whatever seam size you use, be consistent throughout your piece.

Whimsical wild animal fabric and solids strips
Whimsical fabric and strips

Starting Your Patternless Quilt

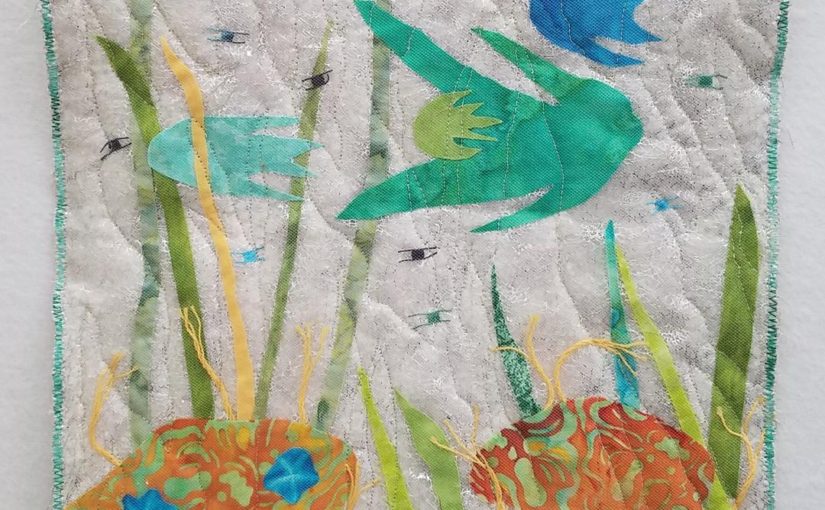
  1. Choose your colors and fabrics,3 solid colors. Fabrics that read solid from a distance are also fine. Some batiks fit this bill. They add interest close up and seem solid from away. Choose 1-3 fabrics of interest to highlight. This could include animals, checks, dots or a number of items. Plan on a quilt of about 44″ x 35″ 112cm x 89 cm. This is the size of my work table. Adjust for your liking or workspace. Yet, this is a doable size for the first effort.
  2. Next,press and lay out the patterned fabric you want to highlight. Cut 3,5,or 7 pieces of varying lengths and widths. Using leftover pieces works well. Trim to make sure long edges are straight. Place fabric on your work space or design wall in a balanced order.
Balanced solid and print fabrics laid out on the cutting table before sewing begins
Balanced solid and print fabrics laid out on the cutting table before sewing begins.

Planning Before Sewing

3. Next, cut the strips of solid fabric. The width can vary. I prefer 4-6″ 10-20cm wide. A wider strip gives you more flexibility if you need to trim it later.Lay them on the table or design wall. Adjust to your liking. Add other colored strips to fill in the spaces. Make sure that the colors are equally balanced across the top of your quilt. That said there aren’t too many pieces of one color on one side of the quilt or the other. Does your eye flow smoothly across the quilt top or does your eye get stuck somewhere? I prefer that the eyes flow or move gently across the quilt top. Step back from your piece to observe. Take a break to rest for your eyes. It is amazing what little errors one might see upon return. You don’t need to lie down just do something else and come back later.

4. Then,begin to sew your pieces together. Finally,add your favorite batting and quilt as you generally choose to do.

a lap quilt of solid colors , magenta, purple, white and violet

Hints to Make a Quilt without a Pattern

  1. When trimming fabric with a design or picture, look at the fabric design before cutting. Pay attention to the fabric’s pattern or animals. Trim to highlight the part of the pattern you want. For example in the wild animal quilt,I highlighted the faces of the animal. On the other hand,I trimmed off the foliage. Take notice and trim fabric from each end rather than cutting from one side only. This extra bit of caution can make a big difference in the look of the final product.
  2. Some printed fabrics have a direction to them. Are all of the pictures facing one way? Or are all the pictures facing all directions? No matter which side it is being viewed from, a face is looking at the viewer. It is your choice if you want all of the pieces ( ie. animal faces)facing one direction or not. We often create a quilt with the designs facing one direction.Yet when it is used a quilt is usually not viewed that way. So don’t worry too much about this.
  3. Have a general idea of where you want certain pieces to be in your quilt. Lay them all out to view before sewing together. Leave them for a few hours or longer to be able to view the pieces with “new eyes”. Are the colors and patterns balanced? Does something catch your eye that shouldn’t? Furthermore, make these changes before the sewing starts.
  4. When piecing the quilt top together, flexibility is necessary. More strips may need to be added. Or at times strips may need to be trimmed. I find that I have more flexibility to make these changes if I sew the top together more or less by sections. For example,sew the upper right corner together. Then move to the upper left corner. Then the lower right corner and the lower left corner. If for some reason another strip or piece of fabric is needed, it is easy to add it this way.

In Conclusion

At this point in my career, I do not use quilt patterns. However, I did use patterns for years to quilt and sew. The rare time I do use a pattern is generally a shape that I have made myself. If sewing without a pattern is new for you, I applaud your bravery. It can be a daunting new experience. At times, it can be very scary. Ultimaltely, it is my hope that you will find it as freeing as I do.

I have several lapquilts on my etsy site made in this way.

https://www.etsy.com/listing/1194284434/contemporary-modern-lap-quiltbabhttps://www.etsy.com/listing/1194284434/contemporary-modern-lap-quiltbaby

https://annbaldwinmayartquilts.com/2022/06/how-to-discover-your-artistic-signature/

https://www.etsy.com/listing/1208240295/contemporary-modern-lap-quiltbaby

Need Help? Try These Low Tech Quilting Hacks

Swimmingly

Low Tech Quilting Hacks

Try these low tech quilting hacks to make to make quilting tasks easier. This post is about my favorite tools that I often  use in my studio. Redirecting materials are a major motivating factor in my art. It so happens that it affects my low tech quilting hacks as well.

Threading the Needle

My regular sewing foot has a white plastic piece that holds it together. A bit of the white forms a background that allows for the ease of threading  the needle. For years, I sewed clothing. Yet, never noticed this because I had no need to change the foot. As soon as I started quilting and began to use different feet, I noticed that threading the needle became more  difficult.

What  Had Changed?

I couldn’t figure out what had changed. It took me a while, the small white background was not longer there. So I recreated the white by using a small piece of white paper. I now keep a particularly stiff piece of white paper close at hand. For easy threading of the needle,  I slip the paper behind the needle. When I  use the walking foot or darning foot for free motion quilting, I can see the needle’s hole much better.

low tech quilting hack
a useful white piece of paper to aide threading a needle

Easing of Fabric through the Feed-A Low Tech Quilting Hack


Many years ago I received a stick that looks like an orange stick used for nail care. Suzanne Cam gave them away as part of  a quilting workshop. This tool has now become an indespensible tool. I use it often to grab threads, to gently guide fabric smoothly through the feed when necssary.

Moving Small Pieces- A Low Tech Quilting Hack

I also use the stick to move small pieces of fabric. For the fabric layering technique,I create my art flat on a table. I place the backing fabric  down first. Then I lay the batting on top.Finally,  I create the scene. At times this requires a gentle movement of small pieces of fabric or yarn. I use the stick for this. Nothing else creates a smooth curve or allows me to control the placement of  small items or details.

low tech quilting hack
a multiuse well used stick

Tiny Globs of Glue

At times I  need to glue items to my fiber pieces. Often I only need  the  tiniest bit of glue not a glob of glue that might show. When my studio was in my home, I would use a plate from the kitchen to put the glue on. After moving to my studio,no plates were readily available.

Making Do

I flipped over the  3 ” plastic cap from the can of starch to use. To control the smallest bit of glue, I use a large needle or hat pin. When finished I can easily wipe off the residue of  white glue .  The pin or needle is then ready for its original intended use.

low tech quilting hack 3
Plastic caps to control globs of glue

A Design Wall

I use a design wall to create my abstract pieces of art. It is essential for me to have a large space available. I would recommend at least 60″ high and wide. My studio design wall is about 90″ by 90″. I covered the wall with a  piece of white flannel fabric. It is held in place by push pins. Portability is not an issue for me. Other quilters  will swear by their expensive design walls. Don’t be fooled! Simple can be just as effective!

my large white flannel design wall design, low tech quilting hack
My large white flannel design wall design

True Confessions Time!

I am not an early adopter nor a gadget person.  Quality standard tools and materials are necessary. These hacks are very low tech. Whatever works! For those still reading this post, I expect to hear  a chuckle or two or daresay I, some laughing out loud at their simplicity.  What simple hacks do you use? Please share.

https://annbaldwinmayartquilts.com/2020/04/forging-your-own-art-path/

More reading that may interest you.

https://annbaldwinmayartquilts.com/2020/03/fabric-layering-technique-another-look/

https://so-sew-easy.com/quilting-hacks-for-beginners/

https://www.etsy.com/shop/annbmayartquilts/

<1001centerstreetsantacruzca>