How to Choose Between Hard or Soft Art Materials

Paddling Along, 10" x 3.5"
Art Materials: Hard or Soft, art in a box with cement tiles and green glass tiles
Green Sphere 9″ x 7″

               Art   Materials:  Hard or Soft

An acquaintance  who follows my work on Instagram recently commented on the progress of my work into hard materials. The comment stopped me in my tracks. What? It made me think. For me, moving into assemblage was something that I had been doing for a while at a very slow pace. Assemblage is a 3D collage generally of diverse found objects.Yes, fabric art quilts are soft and generaly 3D materials are hard. Yet, I hadn’t thought about it that way.

3D Found Materials

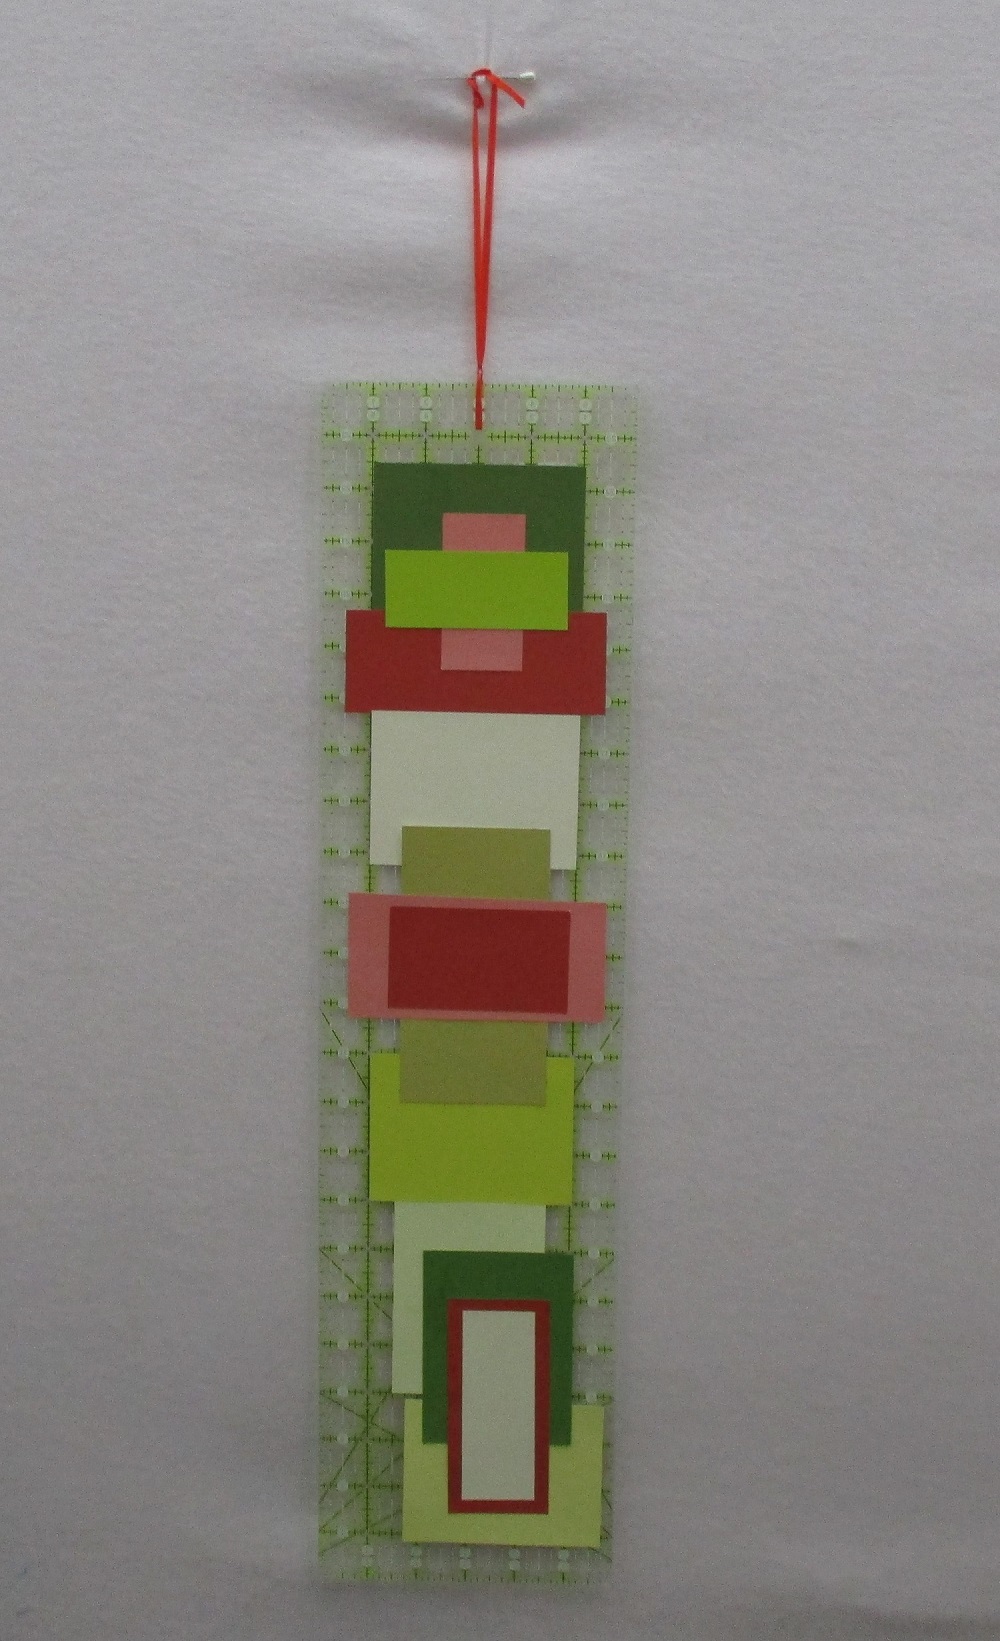
As an art quilter I had often added 3D found objects to my work. Whimsical toy soldiers, artificial flowers, pieces of jewelry are just a few examples. Seeing it from another’s view made me take a second look at what I was doing. Larger tile pieces would be too heavy to work with.As a result, I had chosen quarter inch tiles and other objects mainly due to their size and color.

Inspiration

I draw inspiration from the materials and how they play together. I gather materials without thinking about how I will use them. This process applies to  the hard or soft art materials that I work with.  My sources are redirected sample designer materials. If the small slate-like samples had not been available, I wouldn’t have searched for them. On the other hand, I wouldn’t have even known that they existed.

Materials Front and Center

In the past, I  have spent time looking for the perfect piece of fabric for a project. It was frustrating and time consuming. Moreover, the results were often disappointing. I discovered that my imagined perfect fabric didn’t always perform as perfectly as I had expected. Working with what is in front of me proved more creative, artistic and satisfying.

On the other hand, a shopping situation with distractions galore overwhelms me.  With the materials front and center, I can quickly see that the scale or color either did or didn’t work. This proves more fun anyway even allowing serendippity to happen. Materials,however, fabulous don’t always work for  every project. Save them for another  project.

Tower in City 9″ x 7″

Color! Texture! Movement!

My mantra is Color! Texture! Movement! That is what I want the viewer to take away from my art quilts. Changing to hard materials didn’t fundamentally change that for me.  I do admit it might look differently from the outside or to a viewer on a tiny screen.

The whole concept of choosing hard or soft art materials did not cross my mind. Even though some materials are obviously heavier and harder than others. I selected the background wallpaper to build action and  color into the piece. Slight variations of colors in the pieces of concrete flow.  Variations of  width of the materials add depth.

Scale

The size of the project and time involved encouraged me to widen my artistic scope. Scale followed quickly. One cannot make smaller items without being aware of scale. True confessions time- I wanted some projects with a lower price point. Even small quilts involve time consuming hand work. Yet,smaller doesn’t always mean less time involved in the creation. Depending on the materials at hand,working with a smaller scale can negatively affect the time spend on designing.

People see Things Differently

I appreciate getting insight into how others view my work. The hard and soft comment opened my mind. Some comments from people I take more seriously than others.A comment from an experienced quilt artist would catch my atttention. However, I generally ignore some  comments.  A gentleman once commented that a piece reminded him of a particular place. I listened and even googled that location.Yet, that place had  not been  my inspiration. While  I was willing to listen,  I was not too concerned.  People see things differently. They bring their own experiences to how they view a piece.

Start at the End, Sometimes

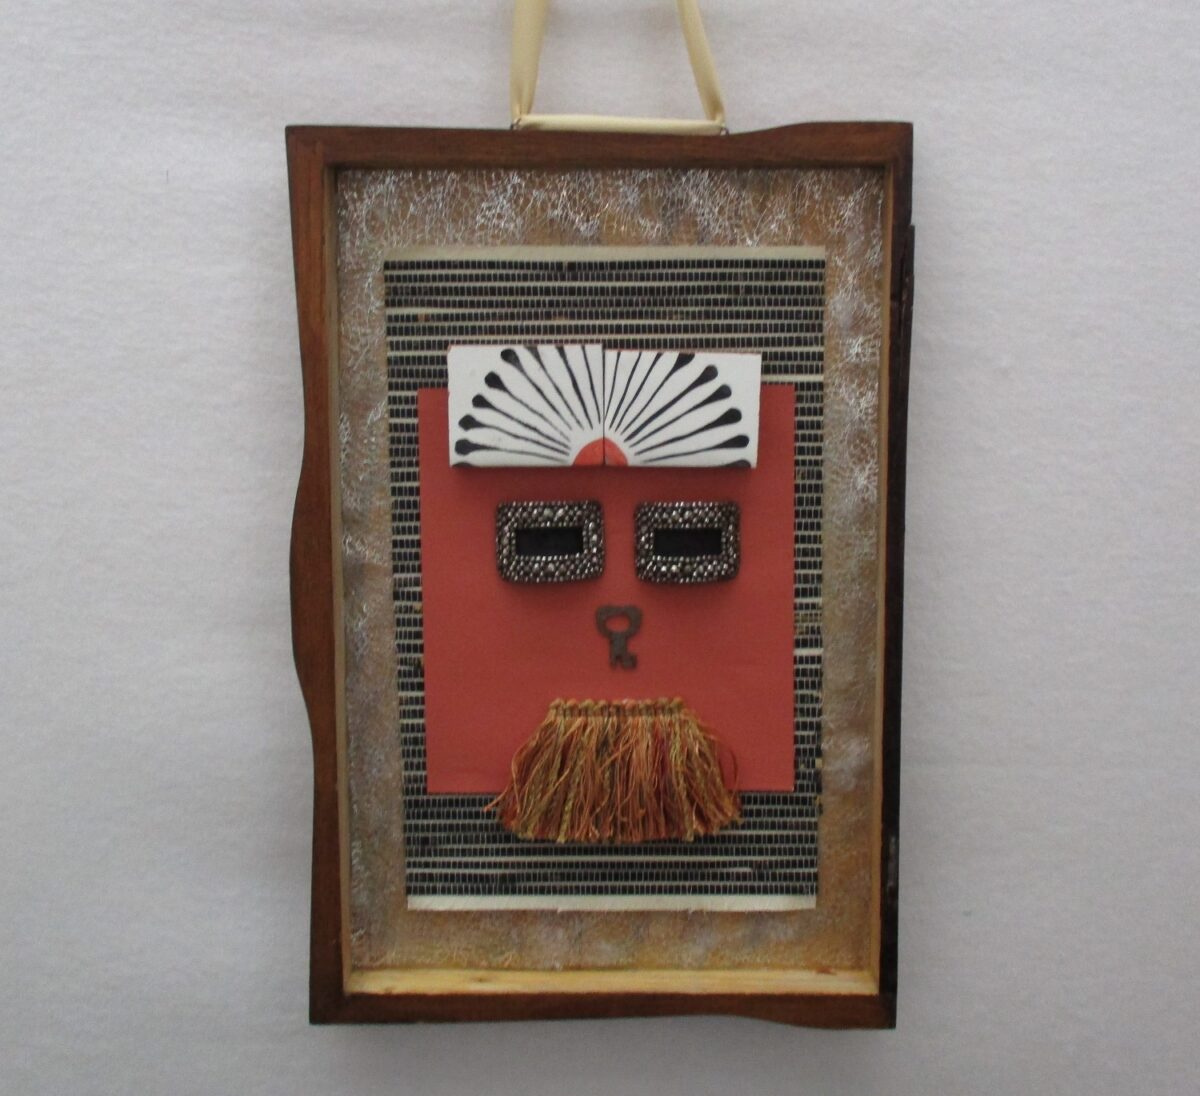
Some of my fiber artist friends are extremely  talented. One in particular would use unusual found objects to create incredibly engaging art pieces. Yet when she was finished she didn’t know how to hang or best display her large 3D work. So I decided that I would consider how to display the work before I got started.  With these assemblage pieces I attached a hook first.Then I continued designing the piece. Working backwards is new process for me.

Art Materials: Hard or Soft
Cityscape, 9″ x 7″

A Unifying Look

Early in my creative process I acquired twelve identical wooden boxes of varying pale colors. That was a good start for me. Usually I never consider how a piece will look next to another piece. This gave me a chance to unify my look. Some assemblage pieces can be hung and some can sit on a shelf or table.

So I start with a frame or wooden box. Then I add a hook to hang it on. Next,I search for wall paper that complements the box color . With luck it adds texture. Because I am new to this process, I want to know where I will end  before I permanently attaching the paper. This may change as I gain more experience. The viewer doesn’t know what the artist began with and how they might have added or subtracted from what was there.
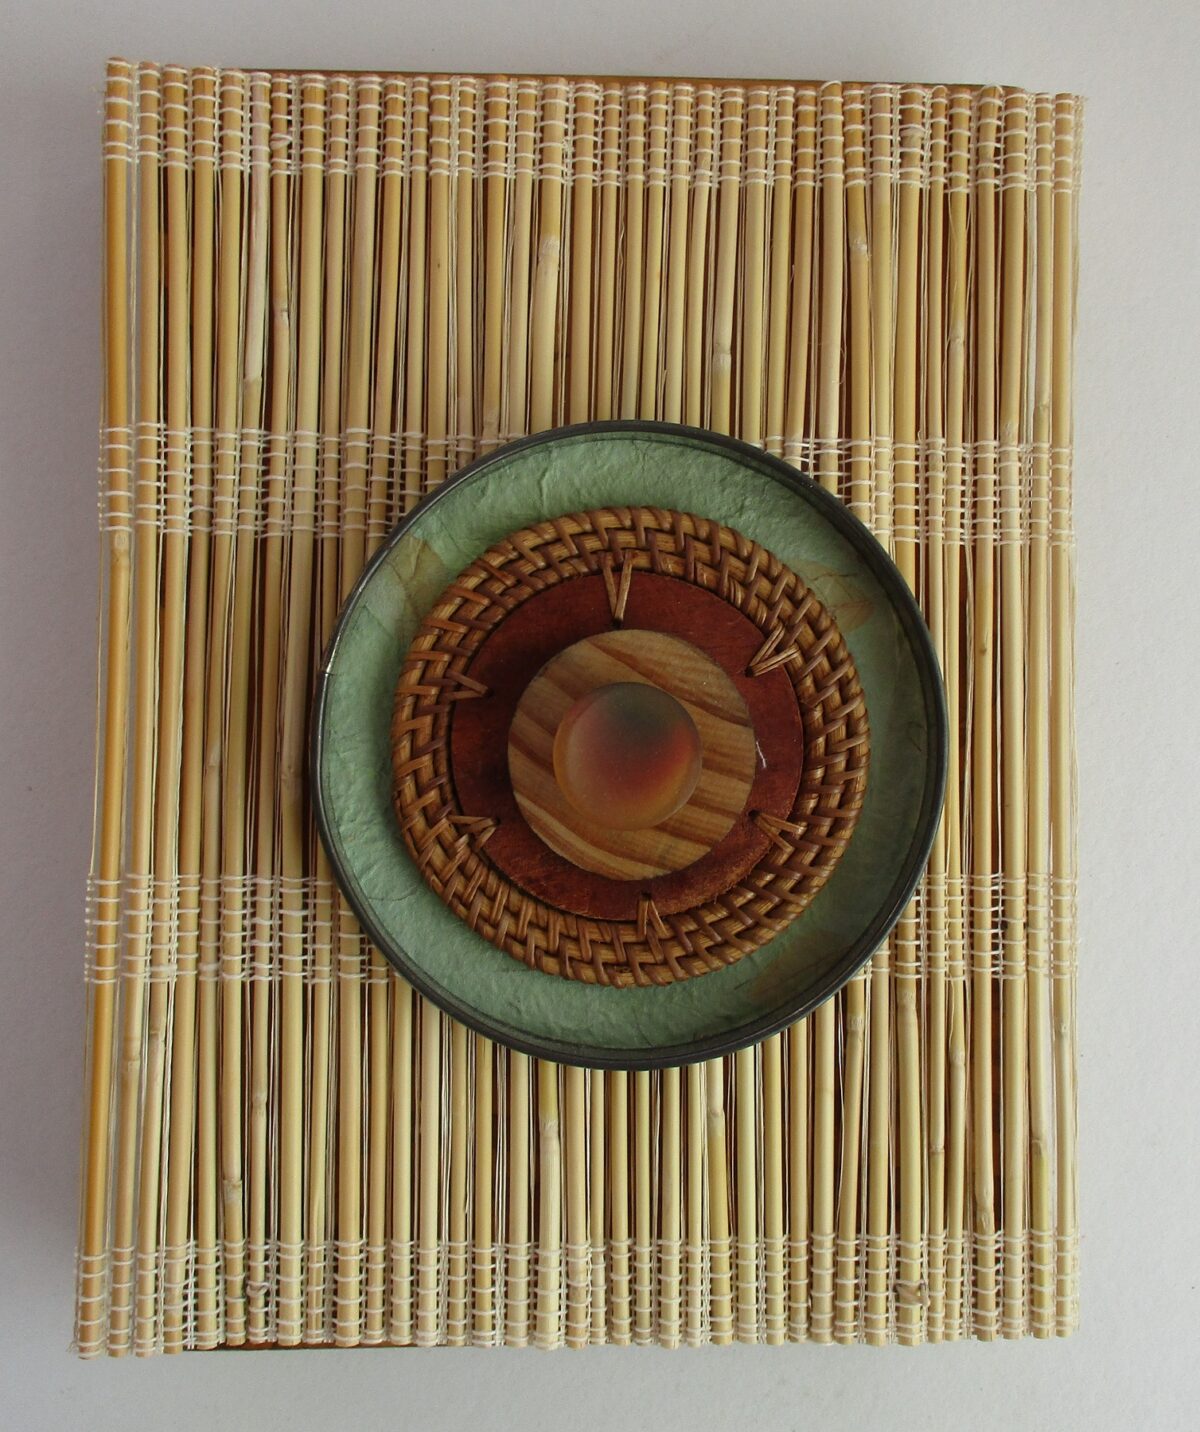
Art Materials: Hard or Soft
What Do You See? 12″ x 7″

Metal or Wood

Assemblage artists generally  choose materials from wood and metal. Personally my preference is wood. Metal just doesn’t speak to me in the same way. In the class I took I learned how to use an electric drill to make holes in metal or other objects. I still have  my childhood skates that attached to my saddle shoes.  I would love to use them in a piece.  Several times I have tried to see what might work with the skates with no success. As much as I love them, I will save them for a later date.

In Conclusion

In conclusion, it is not about the   materials  being hard or soft. It is the color, texture and movement of the surface that inspires this artist to create something new and hopefully exciting. How will you push yourself to try something new? Do your materials inspire you to move to your next level?https://annbaldwinmayartquilts.com/2021/03/beginning-steps-to-creating/

These pieces of assemblage are available at my etsy shop.

https://www.etsy.com/shop/annbmayartquilts/

You may be interested in reading more about assemblage.

https://annbaldwinmayartquilts.com/2021/05/paper-as-art-material/

https://annbaldwinmayartquilts.com/2021/02/recent-attempts-at-assemblage/

https://annbaldwinmayartquilts.com/2021/01/first-steps-towards-assemblage/

https://annbaldwinmayartquilts.com/videos-of-art-quilts/art-quilt-video-2-continues/

https://annbaldwinmayartquilts.com/2021/09/art-in-a-box-assemblage/

A New Art Direction for My Art-Follow my Path

Green and Orange Grid, 6" x 24"

Paper As Art Material

paper as art material

Paper as an art material is a new use for me. I usually cut fabric. A while ago, a visitor watching me cutting a tree out of fabric,  he commented that it reminded him of a friend who does paper collages. While collecting materials for my new direction, mixed media assemblage, I acquired some used frames. I didn’t pay attention that some frames had glass and some didn’t. Yet, I soon realized glass doesn’t work with 3 D objects. So paper collage it was.

A New Art Direction using Paper

paper as art material

Paper Collage

I hadn’t really used paper as art material in my recent history.Yet, I found the process very similar to what I had done with my fabric layering techniques.Although I  cut fabric instead of paper, it was the same process.  The larger pieces go down first. Then I add the smaller pieces.I  like using a long thin skewer or similar tool to gently move small pieces carefully.

Because this process was new to me, I made a sample. I photographed it to remember. Afterwards,I took it apart and began gluing. First, I glued the largest pieces. Then  I added the smaller pieces. My go-to tool is a large pin to add glue under small spaces. It is the easiest tool I have found to glue in tiny globs.

My Motivation

Recently I have been trying some new assemblage techniques.  I needed  to make smaller pieces that would take less time to make and sell at a lower price point. The plan was to use items that I already had in my home and studio. Interesting pieces of discontinued wallpaper came my way and inspired me to use the paper as art material.

paper as art material

Using a Frame

I  began with a frame or wooden box. Oddly enough for an artist,I had never used frames before. My art quilts are finished with a facing on the edges. There is  no need of a frame. Probably the normal way of making art is to create something and then get it framed.

However,I worked the opposite way. I found a gently used frame or a shallow box. The art was based on what I had that would fit inside.I  matched the colors of the frame.  Style,size,scale and color guided me.

A  Surprise

Working with new materials I wasn’t quite sure what to expect. A piece of plastic inside a frame had words on it that I wanted to remove. I figured that it was a decal. I laid it down and poured vinegar on it.    After 30 minutes, the decal could easly be removed with a bit of rubbing.  However, the rest of the liquid had disappeared. Where did it go? It was not on the drainboard. The liquid seeped into the plastic lining. I had to dry it several times as I turned it on its side and the liquid came out. Just a bit of an unexpected surprise!

Reusing and Reducing materials

Reusing and reducing materials is a  great motivation for me. These materials were new to me. Wood, fabric,redirected tile samples and paper speak to me more that metal or plastic. I have used some small metal items. The paper I used was discontinued wallpaper samples.

paper as art material
Grasslands, 5″ x 4″

An Independent Study -A New Art Direction using Paper

In my college years, I completed several independent studies. The process was a familiar one to me. The self directed student chooses a topic or project. They dive into finding information or trying new techniques. The student finishes by creating a new project. As I was creating different assemblage with the found items,I realized that I had basically created  an independent study for myself. No classroom credit awarded of course.

In Conclusion

It is such a joy and welcome distraction for me in these times of the pandemic to find this next direction for my art. This new direction is totally unexpected. My creative juices have been replenished.

More reading that you may find interesting.https://www.annbaldwinmayartquilts.com/2021/01/first-steps-towards-assemblage/

https://www.annbaldwinmayartquilts.com/2021/02/recent-attempts-at-assemblage/

https://www.etsy.com/shop/annbmayartquilts/

How to Begin Creating Art

Face with a Key Nose
Beginning Steps to Creating, Mixed Media assemblage, art in a box with open sides, antique key orange and peach
Orange Key,9″ x 7″

Beginning Steps to Creating Art

Beginning steps to creating art suggests some new ways of thinking about making our world beautiful. Creating comes naturally to humans. We are innately artists. We try to make our world beautiful.  Some of us draw; while some of us paint. Others create beautiful food and table settings for our loved ones to enjoy. Others create beauty in their gardens.

Unfortunately, many of us do not feel that we are artistic. I certainly didn’t for many years. Yet, each of us can create beauty in our unique way. Here are some suggestions for beginning steps to creating a more beautiful everything or whatever you choose.

Beginning Steps to Creating Beauty

Part of my career as an elementary school teacher was spent at an arts infused school. We brought in special artists  to teach across the arts curriculum from drawing, painting to theatre and dance. I had been at this school before this program started.

When the program began, the whole school adjusted  its focus. I witnessed sn incredible shift  in students’ attitudes.  We told the children that we are going to try and make all of our work beautiful. We would not criticize the work of others. Trying to do one’s best was the important part. The attitude of the whole school changed for the better. It was so powerful to witness that change.

Think Differently.

Looking outside the box. Many times it is our own perspective that keeps us from seeing things in a new way. Often we acquire materials or fabric with a particular idea in mind. Then it is difficult to get rid of that idea or to envision a new use for the item.

Beginning Steps to Creating,Do these look like coffee beans on the fabric?
Do these look like coffee beans?

When I got this green fabric, it reminded me of coffee beans. That is the image that stuck in my head. I wasn’t sure how to use the fabric. It sat on the shelf for a long time. Then I began to think differently about it. How could I use it a different way? I decided to use the ovals as  bit of motion in the truck of a tree. What little bits of color could I highlight to pull those colors to the forefront and diminish the greenish colors ? A peachy orange  shade would do the trick. As my county recovered from  the largest forest fire ever, my art quilts reflect that new growth.

Rebirth of a Forest,art quilt,29" x 22" fabric tree made from fabric that looked like coffee beans,greens and oranges
Rebirth of a Forest,art quilt,29″ x 22″

Turn the Fabric Around

Another way to look at a piece of material or fabric in a new way, is to turn it around. If it has definitite figures on it ,what will they look like from another direction? New and unrecognizable is what I would be going for. When an abstract artist finishes a work, they often turn the art upside down and sideways to see if it might look better from a different angle. The original fabric for the trees and branches in Skyward was a black,white and gray fabric that had greyhound dogs on it. The movement of the fabric caught my eye before I noticed that there were actual dogs on it.

grey and black dogs on fabric, Beginning Steps to Creating
Greyhounds
black and white branches on an indigo died background,Beginning Steps to Creating
Skyward, an art quilt

Imagining Shapes

While working on my nature quilts, I cut out shapes for trees, branches, fish, rocks, or waves. I look at the fabric to see if the shapes on the fabric tell me what it would like to be in my piece. Does a swervy line imply  a wave? Maybe a mountrain will appear from the shapes on the fabric? If no shape strikes me on the fabric, then I create my own  mountain or a river. The idea is not to find a piece of fabric that has a river on it. But to create a river from lines that the original fabric artist had not thought about..

Visualization

As I am  creating, I try to  visualize what the piece is lacking. What color or shape needs to be in a particular spot? This often guides me to a hue or textile choice. This is a newly acquired skill for me. I surprised myself  when I realized visualization was happening. You can make it happen for you too.

Activities to Practice Beginning Steps to Creating

Here are a couple of powerful skills that can be practiced with no materials at all. Look at pieces of art in the real or virtual world. There certainly are many examples available on social media. Ask yourself, do you like this work? What do you like about it ? How would  you make it better? If it were your piece to change, how would you modify it?

Keys to my Heart, 9" x 7", mixed media, art in a box, antique keys and white details
Keys to my Heart, 9″ x 7″

Another practice activity is to think of how many different non traditional ways an item could be used. I recently acquired a box of antique keys. I am venturing forward into assemblage, putting repurposed items together in unusual ways. What could the keys be used for?  The possibilities are endless; a nose? hair? or other body parts or just purely decoration? While I searched the internet for inspiration, I came up empty. Left to my own devices,I have sprinkled this post with the ideas that I came up with.

Face with a Key Nose, mixed media
Face with a Key Nose

In Conclusion

Start with baby steps.  Create small bits beauty in your life. Practice helps. I took an assemblage class over two years ago. It took me this long for the ideas to perculate through my brain. Be kind to yourself during the learning process.  Trying in the first step. There are no mistakes just  whether you as the artist likes it or not. If not, modify it. Dip into your humanity and make the world more beautiful.

https://www.etsy.com/shop/annbmayartquilts/

https://annbaldwinmayartquilts.com/2021/07/art-materials-hard-or-soft/

https://annbaldwinmayartquilts.com/2021/09/develop-your-art-passion/

https://annbaldwinmayartquilts.com/2021/01/first-steps-towards-assemblage/

https://annbaldwinmayartquilts.com/2021/02/recent-attempts-at-assemblage/

https://annbaldwinmayartquilts.com/2021/05/paper-as-art-material/

More  ideas- Here is one of my favorite artists.
https://www.janetsilverglate.com/

Scared to try Something New? Follow my Recent Attempts at Assemblage

Piece made in class ,2018

Recent Attempts at Assemblage

Recent attempts at assemblage came about from my interest in  fiber and 3D objects.  Sometimes it can be scary to try a new direction. Moving in a new direction is something that I generally do very slowly.The assemblage art form utilizes found objects that appeal to my deep sensibility for using redirected or upcycled materials. I had been adding 3D found objects to my art quilts since the beginning of my art career. The time came for me to further my skills by taking a class on assemblage. If I can try something new, so can you.

Under the Beautiful Redwoods-2018

Back in the Fall of 2018, I participated in an assemblage class taught by local artist, Janet Silverglate. The day long class met at her house outside under the beautiful redwoods of Felton, California. She introduced us to many new materials and skills. She was generous with both of them. Practicing with an electric drill was a new experience for me. The class learned the importance of working backwards on each piece. Figuring out how to hang or display the piece was one of the first necessary decisions to be made.

The Piece I made in Class

This is the piece that I made. I contributed the fiber background and the metal rim. Janet graciously offered the other  parts including the green paper, and large button on the top. She also helped with the process of adjoining all pieces together that I was having trouble accomplishing. While I am pleased with the finished product, I recognize  that I had a lot of help.

Brown and green circles on fiber background
Piece made in class,2018

I thoroughly enjoyed the day completing my first assemblage piece. As with many beginners, I was in awe of the teacher’s skill and proficiency. She had a large room full of materials that she had gathered. I could relate to that process. I also gather materials without considering their future use.  However, due to a lack of extra space,I  wanted to restrict myself to the materials that I already had. I couldn’t imagine gathering materials for assemblage projects as well as a wide variety of materials for art quilts. Luckily, my inheritance supplied me with a variety of interesting items I could use.

Several Recent Attempts at Assemblage

I took  a long while before I felt the creative juices flowing to try something on my own. Maybe the shelter in place helped in that regard. My thoughts were also that a successful piece begins with an interesting framework or support system. I  was waiting to find a worthy object.

My husband supplied me with a wooden drawer from a small piece of furniture of his mother’s. The drawer was from some sort  of a sewing unit. It had a wooden tray that originally was used to store thread and small items. I turned the tray on its side.

Making Decisions

My inheritance included many sewing items. I found the idea of covering the edges with fabric measuring tape appealing. First, I added screw in hooks to the top for hanging. Then  I glued the fabric measuring tape to the sides.  Here are some of my other first choices.  I moved the buttons around. Eliminating some of the sewing items creates a more general audience appeal.

Trying out ideas with lots of sewing items,spools yarn, small plastic animals for fun
Trying out ideas with lots of sewing items
Highlighting the measuring tape glued on the side.

Trying Different Things

Numerous attempts were  made before settling on this final arrangement.  I had many empty wooden spools that I wanted to use. Yet, previously I had noticed the lack of color in other people’s empty spool projects.   I preferred the addition of some thread color. Luckily, my mother and mother-in-law had left me many sizes and choices of colors. Whimsical animals add fun as well as color!

Wooden Spool Assemblage,2020, spools some empty and some still with thread
Wooden Spool Assemblage,2020

Another Recent Attempts at Assemblage-A Wooden Spool Wreath

For a long time I looked  for inspiration on what I could do with my empty  wooden spools. I did have a lot of them. Finally I saw a unique wreath that inspired me to try to make a wreath using them. I happily found red beads to alternate for a holiday look. The framework is a fiber paper plate holder. It is turned upside down so that it will lay flat against the wall. I  found a metal clip with a circular ring that I had. It attaches like a clothes pin. How easy was that!

Recent Attempts at Assemblage,Wooden Spool Wreath,2020  burlap bow
Wooden Spool Wreath,2020

How to String the Spools

I bought several sizes of  small width dowels to see which size would fit best. I chose the smallest one possible, less than 1/4″ wide to string the spoons and beads on. At first I tried to have all lengths equal. But I broke a dowel so I had to make do. I think that the different lengths are actually an improvement. Mistakes can be good. The tiniest dab of glue  holds each bead and spool in place on the dowel. I repurposed a burlap bow I had received on a recent gift. How serendipitious was that! The finished product hangs in my studio window.

Black Lives Still Matter

Recent Attempts at Assemblage,Black Lives Matter Decoration,2020 red,white and blue ribbons
Black Lives Matter Decoration,2020

What would 2020 be without a sincere homage to Black Lives Matter! I made several similar pieces using patriotic red,white and blue ribbons. On the white part of the ribbons, I wrote A Violation Should Not Be A Death Sentence and Black Lives Matter. It has been obvious to  me for years now that black people were shot and killed rather than just arrested or ticketed for a violation. Now another  variation piece has Equal Rights For All written on the ribbons.

Recent Attempts at Assemblage,Indigenous Inspirations, 2020 a fiber pape plate hold with red beads and feathers
Indigenous Inspirations, 2020

In conclusion, this year of Shelter in Place gave me the time to set aside any fears that I may have had about trying something new. Recent attempts at asssemblage helped me develop my new portfolio. Thanks for letting me share them with you.

https://www.etsy.com/shop/annbmayartquilts/

Check out Janet’s work.
https://www.janetsilverglate.com/

https://annbaldwinmayartquilts.com/2021/01/first-steps-towards-assemblage/

https://annbaldwinmayartquilts.com/art-quilt-galleries/assemblage-3d-collage/

https://annbaldwinmayartquilts.com/2021/03/beginning-steps-to-creating/

Ready to Try Something New? First Steps Towards Assemblage

Aboriginal black and white assemblage 18 " x 14"

First Steps Towards Assemblage

First steps towards assemblage occurred before I was even aware that I was moving in that direction. Assemblage is a newer art form of putting different items together in a new and unusual way. That is to say that with a new focus on recycling and redirecting art takes on new forms.

In addition, it can take on many different forms including metal, paper and fiber. Materials are often found objects. Furthermore,they can either being used as found or taken apart to highlight intricate usually unseen pieces.

First Steps -Ready to try Something New?

Aboriginal b/w assemblage,First Steps Towards Assemblage
Aboriginal,black and white assemblage 18 ” x 14″    2013

In 2013, I completed my first  3D collage piece. For example,some black and white objects called to me. At first, a figure I had made using decorative details   were arranged  on a redirected piece of fiber. Above all if we consider aboriginal to mean the first, maybe the title is prophetic.

Mexican Inspired Fiber Assemblage

Later in 2018, more redirected fiber directed me to make some Mexican inspired fiber assemblage pieces. Here is my Fun with Fiber series.The sizes are generally smaller than 15″ wide. First of all one must consider how to hang the piece before  continuing with the design process.Moreover,you may recognize small decorative details, fabrics and found objects in these pieces.

Native Sunset With Cats, sold
First Steps Towards Assemblage
Bracelet of Beaded Friends
Fun with Fiber,First Steps Towards Assemblage
Fun with Fiber 5
Memories of the Hunt
Worry Dolls

These pieces are smaller and come together faster than an art quilt. They allow me to create these small works of art quicker. They fill a niche for those interested in my art yet with less funds.
https://www.etsy.com/listing/663557452/fabric-with-toothshaped-beadsfiber-art

In Conclusion

Assemblage or 3D collages can be made with many redirected materials. Find a new use instead of tossing it.https://annbaldwinmayartquilts.com/2019/11/mexican-inspired-fabric-collages/

https://www.etsy.com/shop/annbmayartquilts/

<1001centerstreetsantacruzca>