Art Quilters-See Fabric in a New Way

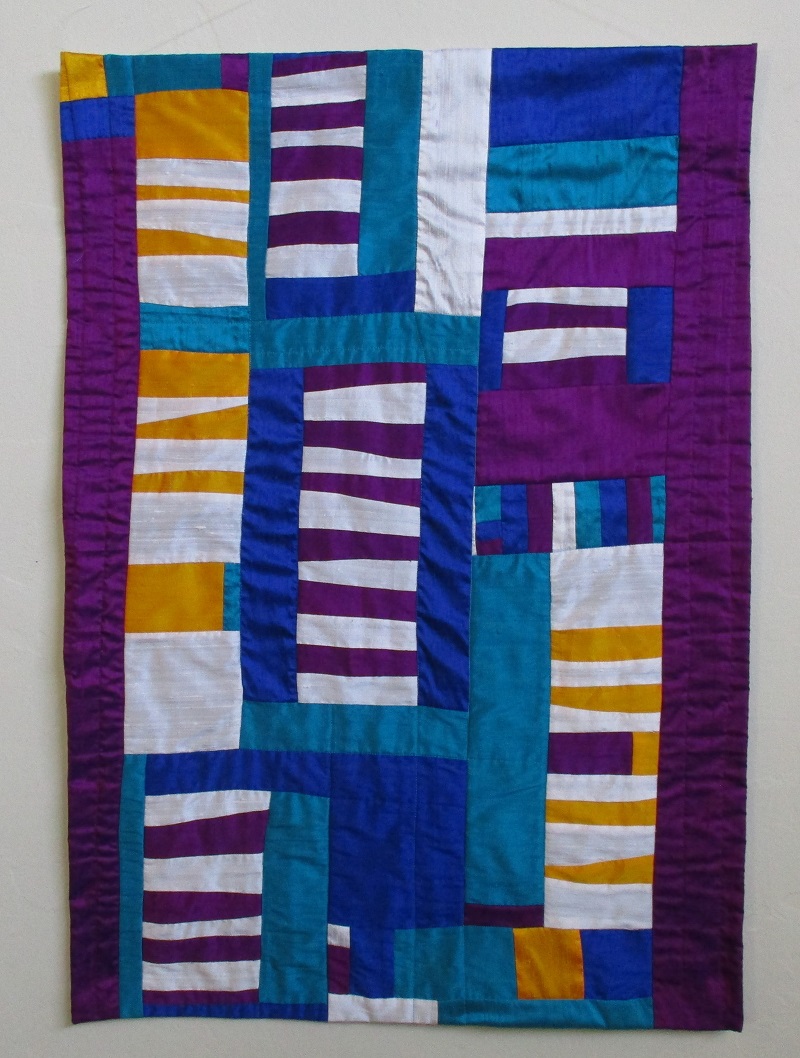
Art Quilters, see fabric in a new way. Above all, creating art is about seeing things in a new way. A class or video frees us to learn new techniques. However,the technique one uses is not the only part that makes the quilt an art quilt. Art quilters often use traditional quilting techniques and others to create something new. In this post, I will focus on seeing fabric, our basic material, in a new way.

Our Sight is Unique.

In reality, one’s sight is unique. No one sees things the same way. Moreover, our perception of colors is individual. In addition, hues change depending on what color is next to it. Furthermore,the amount of light available also affects the way we see colors. Nonetheless,knowing these things frees me to not worry so much about having to find the perfect color. Numerous variables affect the hues and values anyway.

Remember, vision actually takes place in the brain. Connect with what your brain is saying. However,make sure your brain is not sending you negative talk. But truly observe the lines,shapes, and images printed on the fabric. Consider how they could be used and perceived in a unique way.

See Fabric in a New Way

While pondering a piece of fabric,a quilter might start with how one would normally use the fabric. Start there. But then quickly leave that thought behind. Imagine a different way to use the fabric. One that you haven’t done before.

Yet, how do we truly see fabric in a new way? Turn the fabric upside down or sideways. Use the back side of the fabric instead of the front. Furthermore,look at parts of the fabric that can be cut and used differently. Large flowers or other large prints may be cut into smaller pieces to become parts of something else. Make your work impressionistic. Let the viewer decide what they think something is.

See Fabric in a New Way
Rebirth of a Forest

Limit the Line of Vision

Some people find it helpful to limit their line of vision. Use a small empty photo frame or cutout cardboard frame to focus one’s eye.For example,move the frame around on top of the fabric while blocking out the rest. Some find it easier to focus their attention with this simple tool.Use this to choose a part of the fabric that you want to use in a new way.

A Personal Example

Rebirth of a Forest with a coffee bean fabric used as a trunk,29" x 22"  73cm x 56cm
Rebirth of a Forest 29″ x 22″ 73cm x 56cm

May I share a personal example? I had fabric printed with what looked like whole coffee beans to me. Nonetheless,that is what I was reminded of. I couldn’t get that image out of my brain. I tried to see the fabric in a new way. Then I thought that maybe others wouldn’t see coffee beans. It became the trunk of a tree in Rebirth of a Forest after our devastating forest fire. Similarly, practice looking at the fabric in a new way.

Steamy Rainforest,an art quilt, 15" x 15" 38cm x 38cm gold and green with an iguana and blue dragonflies.
Steamy Rainforest,an art quilt, 15″ x 15″ 38cm x 38cm
Mexican Iguana, an art quilt,23" x 21" 58cm x 53cm golden background with an blue and green iguana.
Mexican Iguana, an art quilt,23″ x 21″ 58cm x 53cm

Other Ideas-Reimagine the Fabrics

Start with a fabric that you normally might not use. Maybe choose a so called ugly fabric. How would you make it appear better? For instance, what can you put next to it so that looks more pleasing? If you usually use one fabric style, attempt to use it in a way that you have never have. For example, I recently used Guatemalan fabrics to create the branches and foliage in landscape quilts, Mexican Iguana and Steamy Rainforest. Previously I had used the Guatemalan fabric only as a strip or a block. Furthermore,imagine a different way to use a fabric from what you usually do. Above all any new skill, practice is important. Moreover,practice takes time.

Skies Over Lake Atitlan, 24" x 29" 61 cm x74 cm blocks of Guatemalan fabrics in blues and greens
Skies Over Lake Atitlan, 24″ x 29″ 61 cm x74 cm,an art quilt. This is how I would normally use Guatemalan fabrics.

New Colors

Try colors that you are not comfortable with. Furthermore, a new color combination is a good way to shake patterns up. If this is difficult for you, just change the hues and tones of fabric as a baby step. Practice with a small piece if necessary.

Let the Fabric Help You

How can the fabric help you with something new? We have all tried to find shapes and figures in clouds. Think of it that way. Multicolored batiks and other fabrics can add colors and shapes. What do you see in their fabric patterns? Then cut them out and use them in this new way.

A New Style of Fabric

Choose a different style of fabric from what you usually use.If you usually use stripes, try a batik. Use the fabric for a totally different way. The result will be surprising. Use large Asian flower fabrics as a rock. When cutting or designing a shape, imagine the fabric as material. Ignore the print that normally grabs your eye. Once I chose a fabric based only on the curved lines. It was only later that I saw that the lines were actually greyhounds dogs.

Tree art quilt with the branches made from black,white and grey fabric with greyhounds on it.25" x 23" 64cm x 58cm
Skyward, 25″ x 23″ 64cm x 58cm art quilt made from greyhound dog fabric
Original grey, black and white fabric with greyhound dogs on it. Embellished with couched threads.
Can you see the dogs underneath the couched threads?

Ways to Focus on the Fabric

Notice the lines and shapes of the objects printed on tbe fabric. What do they remind you of? Practice seeing something unique that the manufacturer didn’t plan.The result may be surprising. Reimagine the fabrics to add a new spark to your art quilts.

Focus on the positive space and negative spaces. Positive space is the object itself. Negative space is the space around it that is not the object. Focus on the angles and lines both horizontal and vertical. How can they be highlighted in a new way? Notice the shapes, contours, shadows, and groups of lines of the object rather than the object. This is not easy at first. Give yourself time to practice seeing things differently.

Don’t be Afraid to cut up Fabric.

So often I hear people say that they love the fabric so much that they don’t want to cut it up. Or that they are afraid that cutting the fabric will ruin it. This thought pattern prevents one from trying new things. One must move past these thoughts to create art. Enjoy the fabric for a while but not forever before using.

Bag of Cultural Gems, Mexican inspired Art quilt  29" x 22" 74 cm x 56cm See Fabric in a New Way
Bag of Cultural Gems with Day of the Dead fabric 29″ x 22″ 74 cm x 56cm

True Confession Time

I confess that I had a piece a fabric for a long time without cutting it. A Day of the Dead Mexican skeleton fabric hung on the back of my studio door a long time. Then I cut it up and used it in several art quilts.

Another confession I have to make is I tried making landscape quilts matching the items printed on the fabric to the scene I wanted to make. I searched for rocks printed on fabric. To be honest this gave me a supreme headache. I am not prone to headaches. It was not fun either. I have since chosen to create my own rocks.I use both solid fabric and printed fabrics. However,the printed fabric is not printed with rocks.

Overlook, 35" x 26"   89 cm x 66cm tree art quilt on a hill showing an example of solid fabric rocks.The tree truck is made from a floral piece of linen, couched with yarn.
Overlook, 35″ x 26″ 89 cm x 66cm Notice the of solid fabric rocks. The tree truck is made from a floral piece of linen, couched with yarn.

In Conclusion

Reimagine the fabric to add a new spark to your art quilts. I offer different ideas to use in a wide ranges of techniques and skill level. Some lend themselves to one technique over another. For example, cutting out fabric and adding to a landscape art quilts may be an easy place to start. However, continue exploring. Small changes can have a big affect.

Take baby steps. It can be scary to try something new. Give yourself time to get used to it. Like any new skill, practice is important. Practice takes time. We all get stuck in a rut. It is easy and comfortable to do things the same way that we have always done.

An artist is curious and open to new things. Being creative starts with asking questions? How can I make this better or different? What if I did this a different way? Experiment. Move away from the conventional. Take what you learned in a class and make it your own.Create a point of view and share it with the world. Begin by seeing fabric differently.

I hope that these ideas inspire you. I would love to see what you come up with.

http://www.saqa.com/

https://annbaldwinmayartquilts.com/2023/01/why-one-begins-an-art-quilt/

https://annbaldwinmayartquilts.com/2022/08/add-sheer-fabrics-to-create-a-surprise/

https://annbmayartquilts.etsy.com/

How to Talk to the Public about your Art

Talking to the public about your art is important. However, it is not always an easy thing for artists to do. My home town has a vibrant art scene. Long before I had even considered becoming a quilt artist, I attended local art shows. Naturally, I was drawn to the fiber arts. During this time I had several experiences that informed my later experiences dealing with the public.

Talking to an Artist

At one art event the artist made beautiful artful jackets. I wanted to say something. Yet, I had no idea what to say. I just admired her work. Perhaps I would just say,” Hey,I sew too.” I had no clue as to what I expected her to say.

Knowing how to Engage the Public

Knowing how to engage the public can be difficult. I patiently waited while she spoke with someone else she seemed to know well. When their conversation was over, she turned and walked in the opposite direction from me. It was obvious that I had been waiting to talk to her. Much disappointment on my part. I don’t know what I expected but being left alone was not it. Instead of connecting with a fan, she literally turned her back on her public. Why did she do this? Was she shy? Possibly? or uncomfortable speaking to strangers? Not comfortable talking about her art? It is hard for me to know. It is likely one of these issues.

Another Fiber Artist

Another time a few years later, I spoke with a fiber artist. She cut up antique paper to create abstract art. Having viewed her art several times, I really liked it. The conversation went something like this. “I think you are my favorite artist.” Dead silence.I am not sure what I expected her to say. But what I didn’t expect was nothing. No response from the artist. Aren’t we generally taught to at least say thank you when someone gives one a compliment? It seems that she missed an opportunity to talk about her work. She could have asked me which was my favorite piece or maybe given me a sales pitch of some kind.

What I have Noticed as a Artist

Now that I am an artist, I am on the receiving side of comments. I have noticed that sometimes the public will make unusual comments. The public is not always sure of what to say. At times it comes out strange. Sadly, I can’t remember an example to share. Yet,I believe that people just want to make a connection with the artist.

Don’t get Waylaid by a Weird Comment

Rather getting stuck on responding to the weird comment, I usually just take it that the person wants to interact with the artist. So I reply with information about myself. For example, I talk about my three portfolios, how I got started in quilts and then switched to art quilts.This tactic has proven successful.

One Visitor’s Technique

Many visitors return each month on the First Fridays Art Tour.One such visitor to my studio always said “What is new? Show me your new work.” His young son came in alone while his father remained next door with another artist. The son also asked the same thing. They had a practiced system for engaging artists. Artists can develop a similar plan.

What I Learned

What I learned from these experiences. Obviously artists are all different individuals with unique personalities. Meeting the public is not easy for many.Talking about ourselves or our work is also something people are often not comfortable with. How to fix this situation?

Be Prepared.

Talking to the public and knowing what to say takes practice. Create a laser statement about your work. This is often called an elevator speech. Describe how you work in a few sentences. Practice so that you are comfortable with what you want to say. It could include a bit about your background, inspirations, art process or how long you have been doing art. Remember that you are basically inviting the public into your space. It is your job to make them feel comfortable. It is your party! Welcome your guests!

Be aware of how you are using the phrase, thank you. Thank you is often used in several different ways without us being aware of it. One way that we use it is to end a conversation or transaction. In the art world, we want to keep the conversation focussed on our art. After an artful compliment, follow up with your motivation or inspiration for the piece. Practice makes perfect. Pertaining to a sale, I was once advised to say,”Congratulations on purchasing a piece of art” rather than thank you. By using this phrase, the conversation is elevated for the better.

Treating people with respect is a definite. Respond as you would normally with a direct response. Speak to others as you would like to be spoken to. Relax, smile and do your best. It will get easier.

I recently sold a piece at a First Fridays event. The person loved the small Mexican inspired art quilt. As we finished the transaction, he specifically thanked me for explaining my work to him.

Build on Previous Successes

Often times artists enter the art world after success and experience in other fields. Many of the skills from other jobs transfer well to the second career as an artist. Written and oral communication skills,organizational skills, computer skills and cross job descriptions. Rely on those skills to build your confidence in your new career.

Be Intuitive.

Being intuitive when engaging the public can help you decide the direction of conversation. Recognize that all conversations will not result in a sale. Many people begin sharing about their family’s experience with quilts. If they have a family heirloom at home, will they want to buy another one from you? That is unlikely, in my opinion. Are they fellow quilters? Then they may be interested in your materials and what your process is. Are they beginning to move into the art realm? Maybe they would like to sign up for a class or mentoring.

Knowing when Not to Talk.

Knowing when not to talk to the public is important too. Picking up on little clues helps. Being in the moment helps. During one Open Studios event, a couple came in. They looked around a lot and seemed interested. I tried to engage them in conversation on several topics without much luck. They were not speaking much to each other either. I kept quiet. Later I realized that they were in disagreement as to which piece to buy. My discussion was getting in the way. They bought a large underwater fantasy. Yet, this couple did not desire a lot of interaction.

Get Help.

It is fairly difficult for all artists to possess the wide range of skills necessary for an art career. One should consider developing the skills that they lack. If that is not possible, then get help. If you find that it is just too much for you to interact with the public, find a friend or family member to help you. There is nothing like having someone else singing the praises of your work or what you have accomplished. Especially if they do it in a professional way.

Ways to engage the public.

Disclaimer- I am not an expert on communications. There are many great articles on the internet on this topic. That said my first career as a teacher required me to speak to awide range of people.

Dress the Part.

I like to dress the part something on the artistic side that might identify me as the artist. Before I even say anything, they know that they are in my space. This is time to put on your professional hat. I wouldn’t wear a paint splattered shirt. But that is me. If you are showing your work in the hopes of selling it, then it is the time to show your professional side.

Greet People

Greet people. Make them welcome in your space. Let them know that you are the artist. During First Fridays I display my art in the lobby of the Art Center. My studio is a small area in an unusual corner that is not always obvious. So I point out where my studio is. I bring out my work for First Fridays Art Tour and our annual Open Studios. What is obvious to you may not be obvious to the first time visitor. Use a simple explanation of your situation or layout to engage them.

Practice makes perfect. Think ahead of time of certain information that you would like to share with the public. How long you have been working on your craft? What is your process like? Where do you get your materials? What are you inspired by? Talk about your newest pieces.These are just examples. Speaking to strangers about your art does become easier with practice.

Artist made fabric business card about 3" x 4"  8 cm x 10 cm A good way to engage with the public.
Artist made fabric business card about 3″ x 4″ 8 cm x 10 cm
Artist made fabric business card about 3" x 4"  8 cm x 10 cm A good way to engage with the public.
Artist made fabric business card about 3″ x 4″ 8 cm x 10 cm

Listening to what someone is saying is important. Each art show is an opportunity to learn and develop one’s skills. Keep an open mind. Every conversation is not about making a sale. Enjoy. Feel out the situation. Be authentic. Some people want to talk while others don’t. One has to be open to either situation.

Remember Maya Angelou’s quote,”I’ve learned that people will forget what you said, people will forget what you did, but people will never forget how you made them feel.” Did the visitor feel welcome? Did the visitor learn something about your art? Talking to the public is what Open Studios is all about.

Issues I need to work on

Issues I need to work on while talking to the public.My town is on the tourist trail. I often ask where they are from. That is fine. My mistake is that I will talk about a trip I took to their area rather than drawing attention to my art or my process. Some topics are easier to talk about than myself and my art. I need to direct the conversation to my art and my process.

Engaging with a Fellow Fiber Artist

More recently I went to a local arts fair. I wanted to connect with a fellow fiber artist. He sold jackets with ethnic fabrics as I often used. Mentioning that I have made my own clothes and now I do art quilts. Furthermore I commented that I had just spoken with a fellow artist who was wearing a vest he had made. I was looking for an artist to artist conversation. But this fellow couldn’t switch gears. He kept showing me fabrics that he had available to make a jacket out of. Listening and switching gears can be hard.

The Story Continues

The story continues. A few months after our first encounter this artist came to my studio. I was in the middle of a project. Yet, he popped in and said, “I just wanted to say hi. Don’t want to interrupt. I am also a maker. ” Oh, what kind of a maker are you? As he spoke I realized that I had met him before at this studio. I told him this. I mentioned that I had read something about his work in the local press. His demeanor was quite different from our first meeting. We all have our bad nights. We all just need to do our best and be kind to one another. The important thing is to listen and learn from our experiences. My impression of him is totally different after our second encounter.

In Conclusion

In conclusion, thank you for letting me share some experiences that informed how I talk with the public. Be yourself. But make the people feel comfortable entering your special space. Knowing what to say to engage the public takes practice in order for it to become second nature. With time it should become easier. Enjoy the time sharing your art.

http://www.saqa.com/

https://annbaldwinmayartquilts.com/2023/06/interacting-with-the-art-public-i-felt-like-i-was-in-a-movie/

https://annbaldwinmayartquilts.com/2023/01/life-is-change-develop-a-positive-attitude-towards-change/

https://annbaldwinmayartquilts.com/2021/10/seeing-critically/

https://annbmayartquilts.etsy.com/

https://annbaldwinmayartquilts.com/2023/04/what-most-people-dont-know-about-art-quilting/

How to make a Quilt without a Pattern

Making a quilt without a pattern may sound easy and appropriate for a beginner. However, it is not. First of all,this post assumes that the person has basic quilting skills and materials. As always,choose 100% cotton for ease of sewing and washing. Use a quilter’s cutting board, quilter’s straight edge and rotary cutter. I prefer to use a generous 1/4″ 1 cm seam when sewing.Whatever seam size you use, be consistent throughout your piece.

Whimsical wild animal fabric and solids strips
Whimsical fabric and strips

Starting Your Patternless Quilt

  1. Choose your colors and fabrics,3 solid colors. Fabrics that read solid from a distance are also fine. Some batiks fit this bill. They add interest close up and seem solid from away. Choose 1-3 fabrics of interest to highlight. This could include animals, checks, dots or a number of items. Plan on a quilt of about 44″ x 35″ 112cm x 89 cm. This is the size of my work table. Adjust for your liking or workspace. Yet, this is a doable size for the first effort.
  2. Next,press and lay out the patterned fabric you want to highlight. Cut 3,5,or 7 pieces of varying lengths and widths. Using leftover pieces works well. Trim to make sure long edges are straight. Place fabric on your work space or design wall in a balanced order.
Balanced solid and print fabrics laid out on the cutting table before sewing begins
Balanced solid and print fabrics laid out on the cutting table before sewing begins.

Planning Before Sewing

3. Next, cut the strips of solid fabric. The width can vary. I prefer 4-6″ 10-20cm wide. A wider strip gives you more flexibility if you need to trim it later.Lay them on the table or design wall. Adjust to your liking. Add other colored strips to fill in the spaces. Make sure that the colors are equally balanced across the top of your quilt. That said there aren’t too many pieces of one color on one side of the quilt or the other. Does your eye flow smoothly across the quilt top or does your eye get stuck somewhere? I prefer that the eyes flow or move gently across the quilt top. Step back from your piece to observe. Take a break to rest for your eyes. It is amazing what little errors one might see upon return. You don’t need to lie down just do something else and come back later.

4. Then,begin to sew your pieces together. Finally,add your favorite batting and quilt as you generally choose to do.

a lap quilt of solid colors , magenta, purple, white and violet

Hints to Make a Quilt without a Pattern

  1. When trimming fabric with a design or picture, look at the fabric design before cutting. Pay attention to the fabric’s pattern or animals. Trim to highlight the part of the pattern you want. For example in the wild animal quilt,I highlighted the faces of the animal. On the other hand,I trimmed off the foliage. Take notice and trim fabric from each end rather than cutting from one side only. This extra bit of caution can make a big difference in the look of the final product.
  2. Some printed fabrics have a direction to them. Are all of the pictures facing one way? Or are all the pictures facing all directions? No matter which side it is being viewed from, a face is looking at the viewer. It is your choice if you want all of the pieces ( ie. animal faces)facing one direction or not. We often create a quilt with the designs facing one direction.Yet when it is used a quilt is usually not viewed that way. So don’t worry too much about this.
  3. Have a general idea of where you want certain pieces to be in your quilt. Lay them all out to view before sewing together. Leave them for a few hours or longer to be able to view the pieces with “new eyes”. Are the colors and patterns balanced? Does something catch your eye that shouldn’t? Furthermore, make these changes before the sewing starts.
  4. When piecing the quilt top together, flexibility is necessary. More strips may need to be added. Or at times strips may need to be trimmed. I find that I have more flexibility to make these changes if I sew the top together more or less by sections. For example,sew the upper right corner together. Then move to the upper left corner. Then the lower right corner and the lower left corner. If for some reason another strip or piece of fabric is needed, it is easy to add it this way.

In Conclusion

At this point in my career, I do not use quilt patterns. However, I did use patterns for years to quilt and sew. The rare time I do use a pattern is generally a shape that I have made myself. If sewing without a pattern is new for you, I applaud your bravery. It can be a daunting new experience. At times, it can be very scary. Ultimaltely, it is my hope that you will find it as freeing as I do.

I have several lapquilts on my etsy site made in this way.

https://www.etsy.com/listing/1194284434/contemporary-modern-lap-quiltbabhttps://www.etsy.com/listing/1194284434/contemporary-modern-lap-quiltbaby

https://annbaldwinmayartquilts.com/2022/06/how-to-discover-your-artistic-signature/

https://www.etsy.com/listing/1208240295/contemporary-modern-lap-quiltbaby

Find a Way to Cheat in Quilting

Finding a way to cheat in quilting is a way of letting the fabric do the heavy lifting.Naturally when I suggest a fabric artist to find a way to cheat, I am not suggesting anything illegal. However, I suggest that the background fabric can help you create your art piece. In addition,let the color and design of the fabric add to the work. Fabric collage art brings together smaller pieces to form a unique work of art. Read about background fabric and fabric collage examples.

A whole cloth  with a quilting pattern printed on it known as a cheater cloth.Find a Way to  Cheat
A whole cloth with a quiltlike pattern known as a cheater cloth.

Cheater Cloth has been available for a long time.

Unbelievably, cheater cloth has been around for longer than you would think. Surprisingly, it appeared as early as 1850. A cheater cloth is a whole piece of cloth printed with usually with a traditional quilt pattern. In other words, it is a short cut for some who wants to quilt quickly. In this way, a person can quilt without having to sew the fabric pieces together. However, to be clear I am not suggesting that one use one of these traditional creater cloths in their art work.

Detail of a cheater cloth, a whole piece of fabric that is printed to look like a quilt Find a Way to  Cheat
A detail of a cheater cloth that looks like it has hand embroidery sewn on it.

Using Background Fabric to Find a Way to Cheat in Quilting.

Furthermore, it is only in this vein that I call myself a “cheater.” Use background fabric to do the heavy lifting in some pieces. Recently, a fellow artist commented that I had used some paint on an art quilt. Yet in reality it was a piece of fabric that looked like I had painted it. At times I will do the jaywalking of cheating. Select a background fabric that aides in forming depth in your art.

Find a Way to Cheat Yet Make it Your Own.

Here is an art quilt with a multicolored whole cloth as the background. Find a Way to  Cheat
Here is Beach Tree,2021,an art quilt with a multicolored whole cloth as the background.

Beach Tree, 43″ x 29″ 109 cm x 74cm began with a whole piece of fabric with blended blues and greens. Above all,the multi colored background reminds me of the seashore. Because I live in Surf City, this worked for me. Next,I created a magenta tree on top. Then,I added foliage and leaves to create a tree that is uniquely mine. Indeed,this is the type of cheating that I am suggesting. Use a fabric to enhance your art work. Consequently,add to the design to make it your own. Find a way to cheat in quilting legally.

November Skies,2013, an art quilt of three cranes flying across a blue grey sky.
Find a Way to  Cheat
November Skies,2013
https://www.etsy.com/listing/509597457/cranes-flyingoriginalfabric-landscape

In November Skies, I cut shades of gray, violet and blue clouds to form the background sky. Rocks and plants fill the foreground. Decorative threads imitate birds flying in the distance. Finally, I cut three flying cranes from an Asian inspired piece of fabric. The birds enhance my work with a bit of elegance that I could not have created on my own. I finished the piece by covering with tulle netting. Then I free motion quilted the whole piece.

Moon Ove Slough, an art quilt of greens and browns
Moon Over Slough,2018
https://www.etsy.com/listing/633472057/fabric-landscape-artbeach-artwall

Moon Over Slough,21″ x 21″ 53 cm x 53cm uses a multicolored fabric for the background to create layers in the landscape. The moon,slough plants and rocks finish the landscape. The impressionistic lines reach out to the viewer. Are they mountains? water? or sand? The viewer becomes involved in making their own mind up about the piece.

Kelp Dwellers, an art quilt of underwater life
Kelp Dwellers,2018

Kelp Dwellers, 25″ x 25″ 63 cm x 63cm started with a discontinued abstract multicolored sheer fabric sample. There is so much diversity of fauna,flora and movement under the water. Any fish that I cut out can probably be found under the water. I call these pieces Underwater Fantasies because accuracy is not the goal. Sheer and reflective fabrics help to create a sense of wonder.

My Background Fabric

detail of Overlook, art quilt of a tree Find a Way to  Cheat
detail of Overlook,35″ x 26″ 89 cm x 66cm,2018

Sometimes I cheat with my own work. The sky background is a piece of cloth I dyed in an indigo class. Actually the fabric is the piece that I used to wrap up my work during the process. In this landscape art quilt,Overlook, it worked to create a cloud filled sky as the backdrop to my tree and owl on a hillside.

Adding Little People

The designers of fabric works hard to create interesting designs. There are so many designs to choose from. This is what encourages the public to buy so much fabric. The designs may be of people, birds, or animals. Those of use who are not strong in drawing can cut out a picture from the fabric. Use it in a fabric collage or art quilt. This is a legal way to use someone else’s work.

Here are a couple of whimsical fabric collages that I made at the beginning of my art quilt career. Without the charming fabric of the little people and the bright colors, the effect wouldn’t be the same.

Teaching, the Toughest Job You'll Ever Love , a whimsical, colorful art quilt featuring young children and their interests.
Teaching, the Toughest Job You’ll Ever Love 1, 2012

This art quilt,Teaching, the Toughest Job You’ll Ever Love 1, 48″ x 43″ 122 cm x 109cm is a fabric collage of brightly colored child friendly fabrics. Some small pieces of fabric are fused on. I added 3D flowers, a golden heart and 3D stars to the quilt top. The lettering is bias tape.

A colorful whimsical art quilt featuring  children and their interests.
Teaching, the Toughest Job You’ll Ever Love 2, 2013

Furthermore, I had so much fun creating the first piece I decided to create another.This art quilt,Teaching, the Toughest Job You’ll Ever Love 2 is a bit smaller, 27″ x 26″ 69cm x 66cm. Yet, I again used fused pieces and 3D objects added the pieced fabric top.

In Conclusion

It is my hope that you will become inspired to try these techniques. They are another skill to add to your toolkit. Creating a unique piece of artwork that could only be yours is the goal.

You may also be interested in reading more.

https://annbaldwinmayartquilts.com/2022/04/free-motion-quilting-hacks/

https://annbaldwinmayartquilts.com/2020/03/make-a-fabric-landscape-collage-quilt/

https://annbaldwinmayartquilts.com/2022/06/how-to-discover-your-artistic-signature/

http://www.saqa.com/

https://annbmayartquilts.etsy.com/

How I found Unusual Color Combos in Art

As an abstract art quilter, I am always looking for unusual color combos. They show themselves to me in the most random of places. Read to learn how I found unusual color combos in art.

Lingering Fog, 34″ x 34″ 87cm x 87cm

A previous post discussed the steps for creating a light and dark grey piece contrasting with lime green. I discovered this unusual color combo when I noticed scraps I had tossed on the floor. Serendipitious success. How I found unusual color combos in unusual places.

How I found unusual color combos in art.

Recently I found pieces of fabric from different projects that I had thrown together in a bag. I discovered a charming unusual color combo of light purple and a yellow orange.

Spring Sunset 12" x 12 ", an abstract  art quilt of violet,amber,lilac and pale yellow,In Search of Unusual Color Combos
Spring Sunset 12″ x 12 ” 30cm x 30cm

Meanwhile, I looked up the name for a yellow orange color. It is called amber. What? I thought amber was a darker color. Surprisingly,it turns out that amber is directly between yellow and orange on the color wheel. As a result,I am now convinced that the color is amber.

Lilac

Lilac, a light or medium purple has not always been my favorite color. Growing up it was the springtime purple of choice. Maybe my mother’s dislike for the color influenced me.

However in these times of COVID I find my choice of colors changing. Previously my mantra of Color! Texture! Movement! usually included bold bright colors. These days the colors of choice are lighter and subtle creating calm and peaceful emotions.

In Search of Unusual Color Combos,Goldenrod Blush, art quilt of beige,cream and yellows
Goldenrod Blush,31″ x 32″ 79cm x 81cm 2022

My focus on incorporating texture and movement remain. For some of the fabrics,I sewed a layer of lace on top of a sturdier fabric. Next, I couched (zigzagged)decorative threads on top. Then I cut the lace into smaller pieces.You may be interested in reading other blogs on how to add more texture to your art quilts.

https://annbaldwinmayartquilts.com/2020/02/add-decorative-threads-for-texture/

https://annbaldwinmayartquilts.com/2019/07/creating-texture-in-art/

A color coordinated fabric storage area looks appealing. However, it reduces the chance for coming across an unusual color combination.

Certainly, finding unusual color combinations begins with open eyes and an open mind. Unfortunately there are no easy pathways forward. Ultimately,each artist must take this road on their own.

Learn more about the international organization for art quilters, Studio Art Quilt Associates. https://www.saqa.com/

https://www.etsy.com/shop/annbmayartquilts/

Five Mistakes New Quilters Make

Just like everyone else new quilters make mistakes. Mistakes are part of the process of becoming a master quilter regardless if you are making art quilts or traditional quilts. Most of us are not proud of our earliest works. Yet, when an artist is accomplished, they make it look easy. The artists have practiced so much that it is hard to imagine that they ever made mistakes. Here is a review of several mistakes new quilters make.

Mistake #1-Poor Fabric Choices

Thinking one can make a quilt out of just any piece of fabric that they have. Yes, people make quilts out of used clothes or fabric that they have. But for a successful piece, their choices are based on their knowledge and their experience with that fabric. Plus if there is a problem then an experienced sewer or quilter will have an idea about how to fix the problem.

There is a reason that commercially available clothing patterns list the types of fabric that would work best. New quilters can stick with 100% cotton for the most success.

Another Mistake New Quilters Make

An acquaintance with limited sewing experience wanted to make a baby quilt to give to a friend. She choose to use soft and stretchy fabrics that she had left over from other projects. Soft and stretchy materials are difficult to work with.

On the other hand, parents are rightly concerned about what will touch their baby’s skin. One hundred per cent cotton fabric is safe and the most comfortable for a baby. On the other hand, soft minky fabric is nice for a backing.

Mistake #2-Washability and Care of the Quilt

Cotton fabric that is 100% cotton is easily washed. My inexperienced friend chose a dark multicolored patterned fabric for the baby quilt. Of course,patterns and styles of choice change. However,most new families want a light colored quilt. They are also concerned about washability.The color choices for this baby quilt were dark. In my opinion, the colors didn’t even coordinate well. In addition, most parents would prefer new materials to be used with an infant.

Mistake #3-Lack of experience with a sewing machine

In my opinion, the major sewing machine brands are of good quality. Even older and more older machines work well. That said when I bought my Lily Husquavarna over 20 years ago, a particular brand of thread was recommended to use with the machine. Quite by accident, I learned that other brands actually had better results. People swear by their Bernina machines yet I read that they can be fussy about the correct needle being used for the type of project. Learning the quirks of one’s machine is part of the learning process.

Mistake #4 Lack of Process Planning

Creating an art piece takes a loose plan. One needs to have an idea of what part needs to be completed before another part. Often an inexperienced art quilter will create a beautiful part without an idea of how to mount or display it. For example, an intricite portrait will be created, Yet,the artist will then not know what they need to do next. How should it be displayed? What fabric would highlight the work?

Similarly, at the beginning of her art career,a very talented fiber artist would make nature inspired 3D works. She wanted them to be free standing. Yet, she made them without planning for the structure that would allow them to be free standing. As I tried mixed media and assemblage,I remembered that lesson. Consider the final structure first. How will it hang? How will it stand up?

Mistake #5-Poor Color Choices

Quite a few years ago, a friend asked me to make a baby quilt for a relative. We went to the fabric store together to choose some fabrics. These are the green and blue fabrics she chose. While each fabric has its merits individually, I would never have chosen them to be the only fabrics in a quilt. As it was an early commission for me, I didn’t feel at the time that I should say anything. However, this poor color choice stayed with me for a long time.Needlessto say, I have developed my artist’s voice over the years. I would definitely express my opinion if this happened again. It pushed me to rethink and validate my experience in choosing colors.

Two fabrics, blue floral and green
Two fabrics,blue floral and green

A friend mentioned to me today that her sister made a quilt for her.They had lots of blocks with hand embroidery added. The friend didn’t really like the quilt. Her sister said she didn’t have to keep it if she didn’t like it. The friend wasn’t sure what to do. She mentioned that her sister’s quilting skills were not so good. The sister mainly made quilts for the family. When I finally saw a photo of the friends’s quilt, I had to admit that it had some charm. Maybe not totally to my friend’s taste but still charming in its own right.

Nonetheless,this reminded me of the steps that people go through before they attain mastery. Lots of mistakes are made along the pathway to excellence. However, when someone looks at a quilter’s successful piece, the failures are not visible.

In Conclusion

My intent is not to criticize or shame someone’s efforts. We all start somewhere. However,I want to acknowledge the effort and experience that goes into the long path towards the mastery of skills. Our passion pushes us to continue to learn from the mistakes that new quilters make.

https://annbmayartquilts.etsy.com/

https://annbaldwinmayartquilts.com/2022/05/reuse-dont-toss/

Do you Believe Serendipity Brings Joy?

Two random win-win situations happened to me recently. During COVID, passing unwanted items on had been a challenge. While Goodwill was open, I wanted to pass fabric related items to a more appropriate place where they would be welcomed and appreciated.

a basket with many colored spools of thread, two random win wins
Here is my basket of threads. I generally am not fussy about the type of thread I use for most kinds of sewing.

I had some spools of thread that I couldn’t use. The threads were too thin or too thick . Luckily, our quilt guild would be having their annual show soon. This show includes a Bargain Garden flea market. I had them in a plastic bag. They were ready to be donated to the upcoming flea market.

a straight pin and a longer quilting pin

Serendipity Situation #1 Brings Joy

A young man popped into my studio. He graciously explained that he and his friends were making dream catchers for their families. He asked politely if I might have some threads for them to use. I handed him the bag of 10 spools. He was thrilled. He bought me a coffee. When he returned with the coffee, in addition,I offered him some yarn. People give me items all of the time. I was thrilled to be able to pass the items to this person who definitely was a fiber enthralled person. A win win situation #1

Serendipity Situation #2 Brings Joy

The pins I like to use are quilters’ pins. They are a bit longer than normal straight pins. They measure closer to 2″ instead of 1 “. Somehow my pin cushion had several of the shorter regular pins in it. It was annoying at times to grab the shorter pins when I needed a longer one. A neighbor stopped in. She needed some pins to borrow. Most importantly, I was able to pass on those annoyingly short pins. Another random win win.

a brightly colored  pin cushion with ladybugs, two random win wins
My pin cushion
The back side of my pin cushion with bright lady bugs. two random win wins
the back without all of the pins

In Conclusion

Did I know that these situations would happen in the same week? No. Was I happy to have these situations occur? Yes! I believe serendipity brings joy. These random win wins events were welcomed more than ever especially after these two years of COVID. May you have more joy from serendipity in your life too.

https://annbmayartquilts.etsy.com/

https://annbaldwinmayartquilts.com/2020/12/artful-fabric-business-cards/

https://www.saqa.com/

https://saqanorcalnv.com/

How to Master Free Motion Quilting

Follow these free motion quilting hacks to help you master free motion quilting. I share the techniques and suggestions that have helped me achieve success. What does one need to get started? Can something be saved for a later date?

Nature Art Quilts,Make a Fabric Landscape Collage Quilt, tree on a hill with a fence
Overlook 35″ x 26″ 89 cm x 66cm 2018 Uses the fabric layering technique.


What do you Need to get Started?

  • a sewing machine that lets you lower or cover the feed dogs
  • a darning foot
  • Aurifil brand 100% cotton thread (found in better quilting stores)

What can you Put Off for later?

In my experience, these things that can be left for later. It is a personal choice. I saw quilting gloves mentioned as a necessary item to begin free motion quilting. I personally have never used these.They may be helpful for someone. But they don’t seem esseential to begin.

Many quilters like myself are draw to charming stipple quilting. On the one hand, stipple quilting is lovely and adds a lot to your quilt. On the other hand, it draws attention to the quilting. For this reason, it isn’t the best for a beginner. Leave stipple quilting until later when you are more skilled. I use another technique that works better for quilters new to free motion quilting. See hack 3.

Free Motion Quilting Hack -1

A darning foot is also necessary. If your machine didn’t come with one, they are easy to obtain. Buy one for your brand machine.

a darning foot

Free Motion Quilting Hacks-2

The best thread to use is Aurifil brand thread 50 weight 100% cotton. It comes in a lot of colors. However, it is generally only available in better quilting stores. At first, a spool can seem expensive. However, the thread is very thin. There is a lot of thread on each spool. I once pieced and quilted a complete double size bed using only one spool of this thread. This thread is highly recommended for free motion quilting. It truly will make or break your work. In the beginning, choose a thread color that matches the background. The threads blend in. Irregular lengths of stitches won’t show as much.

Aurifil thread 50wt
Aurifil thread 50wt

Free Motion Quilting Hacks-3

My preferred method of free motion quilting is to use the fabric layering technique. In the beginning,I was able to practice with satisfactory skills. As a result, I continued practicing. Therefore, leading to the mastery of the skill. My machine is a 20 year old Lily Husquarna. It is not a special machine,just a regular sewing machine.

To be honest, before I learned this technique, I was ready to give up on learning free motion quilting. I was not having any success. Therefore,I was very frustrated. In short, it is very forgiving as one develops their skill.

spools of thread for free motion quilting
I only use Aurifil brand thread for free motion quilting.

How to do the Fabric Layering Technique

Basically the fabric layering technique starts on a table. To begin, lay the backing fabric down. Start with a smaller size like 12″-14″ about 30 cm square. Then put the batting on top. Similarly, cover the batting with a background fabric that enhances your scene.Then create a scene with fabric. A landscape is an easy way to start. Cut out pieces of fabric for your scene ie. trees and rocks. Then lay the pieces on the background fabric. Continue until you have made a pleasant scene. Place a tiny dab of glue from a glue stick to keep pieces in place while quilting. Cover with tulle netting. Free motion quilt.

Free motion quilting allows the quilter to control the movement of the quilt. In order to do this, the quilter must lower the feed dogs on their sewing machine. The feed dogs are on the flat part of the machine. They control the movement of the fabric. Most newer machines have this feature. Mine is twenty years old and it does. If you are unable to lower your feed dogs, cover them. However, I am unfamiliar with this.

a basket with many colored spools of thread
Here is my basket of threads. I generally am not fussy about the type of thread I use for most kinds of sewing.

Fast Feet Slow Hands

While free motion quilting you should say to yourself, fast feet slow hands. What does this mean? The throttle makes the machine go fast. Your foot usually controlls the trottle. Push the throttle fast but evenly. At the same time, your hands should be moving slowly. Pull the sides of the quilt taut while quilting. Practice moving them at the same rate at an even pace.

Checking your Stitches

In the beginning, quilt following the outline of the tree or main object in the scene. Check your stitches by looking on the back of the quilt. Loose or lengthy stitches mean the hands are being moved too quickly. Those stitches need to be taken out.As you get better you can create free form grasses or branches or movement with the sewing threads. Read more about this technique. https://annbaldwinmayartquilts.com/2017/07/fabric-layering-technique/

Shows With My Work One Fabric Three Art Quilts
DesertTrees in the Wash, 25″ x 24″ 64 cm x 61 cm 2021
Another example of the fabric layering technique.

In Conclusion

Free motion quilting is another tool to add to your quilting tool box. Yet, there is no easy fix for mastery this technique. Put in the time to practice,you will be rewarded with a higher level of skill. Use the suggestions here to make your path more successful quicker and less frustrating.

View more Art Quilts

View some art quilts I made using the fabric layering technique and free motion quilting.

https://annbaldwinmayartquilts.com/2021/01/trees-in-art-quilts/

https://annbaldwinmayartquilts.com/2017/07/fabric-layering-technique/

https://annbaldwinmayartquilts.com/2021/04/birds-in-art-quilts/

https://annbaldwinmayartquilts.com/2021/04/marine-life-in-art-quilts/

https://www.saqa.com/

https://annbaldwinmayartquilts.com/2019/08/new-york-art-center-in-tribeca/

https://saqanorcalnv.com/

Does it Help to be an Educated Artist?

An Educated Artist,Love in the Abstract 26" x 24"    2017   Purple, pink and red in this abstract art quilt
Love in the Abstract 26″ x 24″ 66 cm x 61cm 2017

An Educated Artist

I met an educated artist a while ago. Subsequently, we talked about art. She knew all the names of the unique colors. At certain times of the convo, I didn’t even recognize the name she used. Initially,her depth of knowledge blew me away. I had not studied art. I had not memorized nor had even heard of some of the colors. In short, I assumed that she was an excellent artist. However, was I correct to make that assumption?

Her Work

Subsequently, she showed me some of her work. These included drawings,paintings and mixed media that had done over the years. Her work was good not great or spectucular. Knowing all the correct art terms didn’t help her create better art. Maybe time spent is the studio is important. Focus one’s attention. Decide what one’s goals are.

What Makes a Great Educated Artist?

So what really contributes to making  a great artist? Skills, time to practice, resiliency, and above all, the mastery of materials.

Skills and Materials

The great thing about art is that everyone can and should make art. Humans need to make art. Each human can choose what skills and materials they want to use. They may choose materials that they have readily available. The skill needed to use those materials needs to be developed.

Time

One has to have time to develop those skills. Time could be set aside daily or weekly. Or on the other hand, it could be developed over years. It is difficult to juggle a job, family and art. Each person gets to choose how they will handle it.

Resiliency

Resiliency is necessary to keep going. Artists need it so that they continue on in spite of setbacks. One cannot give up. Making a living from selling art is hard. Some choose different pathways to do something in art for their career. Teaching or commercial art are just two paths. Others wait until retirement to work on their art full time.

In Conclusion

Skills and the mastery of materials, time, and resiliency contribute to the making of a great artist.

https://annbaldwinmayartquilts.com/2021/10/seeing-critically/

https://annbaldwinmayartquilts.com/2022/06/how-to-discover-your-artistic-signature/

https://annbaldwinmayartquilts.com/2022/01/to-frame-or-not-to-frame/

http://saqa.com/

https://annbaldwinmayartquilts.com/2021/12/on-calling-yourself-an-artist/

https://annbmayartquilts.etsy.com/

Is it Important to Frame an Art Quilt?

tree with leaves flowing outside of the frame
Rusty Leaves, 29″ h x 21″ w
73cm x 53 cm

Art quilts are a newer art form. Creating art with fabric is not like creating art with paint. We create our own canvas of sorts with our backing. We finish the edges with stitches.We do not need an additional frame to complete our work. Some quilt artists add a fabric frame but that is different.

Art quilters need to embrace the uniqueness of their art form. Art quilts come in many fabrics,colors and sizes. There are no predetermined sizes like with a canvas. Sometimes  quilt artists choose a smaller size to try out a new technique or for a gift.

More importantly, in order to gain acceptance, some quilt artists frame their art. That way it is immediately recognizable as a piece of  art similar to a painting. Furthermore, who doesn’t want their work readily accepted by the public. I get that.

Yet, quilt edges are always finished. It is part of the process. Quilt edges are generally finished by several methods.  Sew a facing on the front  and turn it to the back for hand stitching. Zigzag twice on the edges. Some art quilters prefer attaching a binding like a more traditional quilt.

All artists want their work accepted as art. However, educating the public about art quilts is necessary. Why add a heavy frame? It is redundant and unnecessary. Why do it?

Framing Art Quilts is Different.

Fabric is a unique material to use to create art. It moves and stretches a bit. When I started creating art q;uilts, I thought that they were to lie flat against the wall. Then I visited the San Jose Museum of Quilts and Textiles.https://www.sjquiltmuseum.org/ The incredible quilts on display did not lie flat against the wall. Naturally, I gave up that idea. Art quilters need to embrace the uniqueness of their special materials.

magenta tree with irregular shape on edges
Beach Tree, 34″ x 29″ 86cm x 73cm


11 Reasons Why I Don’t Frame my Art Quilts

  • The edges are finished. There is usually a facing, binding or the edges are zigzagged twice. Nothing more is needed.
  • Fabric encourages a different type of artistic expression. Leaves can flow off of the sides. A frame would cover up that expression.
  • I send my art quilts by rolling them up. They take up less space.
  • I store my art quilts by rolling them up with the front to the outside to prevent wrinkles. It is amazing how little space they take,
  • Be forward thinking. Ditching the frame immediately shows movement away from a tradition.
  • A frame is more heavy and cumbersome. What artistic value does it add to the art quilt? Trying to match styles can be difficult.
  • In Earthquake Country or Tornado Country, a heavy frame over a bed is not advisable.
  • I can carry all of my quilts for a solo show under  one or two arms. I  roll them up together. They are not heavy.
  • Frames adds extra unnecessary weight whether they are wooden, metal or another material.
  • When storing an art piece,a frame takes up more space.
  • A frame is expensive.
  • I store my quilts rolled up in a closet. A temporary tag pinned to the top allows for fast identification of each individual quilt.

Exceptions to Not Framing

I realize that there may be exceptions. It is possible to frame an art quilt. On the other hand,in some permanent public settings, framing may be preferred. Museums or other public and private organizations may want a consistent look in their presentation of the artwork. Permanent collections do not move often. The situations are different.

In Conclusion

Why add a frame if it is not necessary? Frames are expensive, heavy, and take up more space. On the contrary, they can not be rolled up for easy storage,shipping or carrying. More importantly, some painters are now painting the sides of their canvases so frames will not be necessary for them.

http://annbmayartquilts.etsy.com https://www.saqa.com/

https://annbaldwinmayartquilts.com/2022/01/frequently-asked-questions/

What Do You Want to Know? Frequently Asked Questions

Smilin', the all silk art quilt was made after one of the times that we thought the Pandemic was over.

Frequently Asked Questions about Materials

  • Where do you get your materials from?

Above all,I usually get my materials from FABMO, a nonprofit that gathers materials weekly  from the San Francisco Design Center. fabmo.org Then they make the materials available to the public to keep them out of the landfill. Furthermore,these materials are new, high end , high quality fabrics. For example,linen, silk and other unique fabrics are readily available. Most importantly,these fabrics cannot be found in regular fabric stores. It is a win-win situation.

More recently, people have been giving me fabric.Thy know that I will put good use to it. Sometimes it is just a few yards and sometimes it can be more.When a loved one who sewed passes, they may leave behind a lot of fabric. This year I was gifted a lot of fabric in this category. I keep the pieces I think I might use and pass on the rest to others who may use it.

Frequently Asked Questions about Inspiration

  • What motivates you?
    Using fabrics and materials sustainably motivates me. I rarely throw anything out.
  • Where do you get your inspiration/ideas from?
    My inspiration comes from how the materials play with one another. I usually decide ahead of time which portfolio I will make next. It could be abstract, nature, or Mexican inspired.

Frequently Asked Questions about Time

  • How long have you been sewing or quilting?
    In high school,I took two years of sewing. Then I continued sewing. In the 1970s,I took my first quilting class at a neighborhood fabric store. I stopped counting my bed quilts at 300. Then around 2008, I began making art quilts.
  • Doesn’t it take a long time to make a quilt ?

Yes, it does. But I used to think about writing a book. A quilt doesn’t take as long as that.

Sewing Questions

  • What kind of a machine do you use?
    Above all,my machine is a computerized Lily Husquavara.
  • Do you  sew by hand?
    For instance,I hand sew my sleeves or fabric tubes. Furthermore,art quilts with facings are handsewn to the back. Moreover, most of my quilts are done by machine. On the other hand,I do sew small details or found objects on my art quilts. by hand. However, the majority of my work is machine pieced and machine quilted.
  • Do you sew clothes?
    In short,I rarely sew my own clothes anymore. In the same vein,I do not sew clothes for others.

Other Questions

  • Do you do memory quilts?
    I do make memory quilts. People give me or send me the clothes from their loved one. We work together to decide on a style that will work for the client. I have made wall art and traditional and non traditonal lap quilts from the clothes. As the work progresses, I send photos to keep the client informed of progress.
  • Do you teach classes?
    All in all,no, I don’t teach classes. However,post COVID I have starting a mentoring project. A more personal 1 on 1 situation based on what skills the student would like to learn or what direction they would like their sewing,quilting or art career to go.
  • Have you been to Paducah, Kentucky, home of the National Quilt Museum? No.

https://annbmayartquilts.etsy.com/

https://annbaldwinmayartquilts.com/2017/07/fabric-layering-technique/

https://annbaldwinmayartquilts.com/2021/10/something-about-memory-quilts/

https://annbaldwinmayartquilts.com/2022/01/to-frame-or-not-to-frame/

https://annbaldwinmayartquilts.com/2022/05/reuse-dont-toss/

How to Feel Good about Calling Yourself an Artist

On Calling Yourself an Artist,tree art quilt
Along the Path 34″ x 22″ 86cm x 56cm

Feel good about calling yourself an artist

I create wall art with fabric. They may be abstract, landscapes or seascapes. I have been doing this for over 10 years. Yet why is it so difficult to call myself  an artist. It becomes easier when I am  writing it on a show application.Why don’t I feel eel good about calling myself an artist?

What is the image of being an artist? The  label artist comes  with  many postive and negative expectations.  On the positive side, artists are  flamboyant. They do the unexpected. Following society’s rules are not for them.  One might say that they were the first rock stars. This lifestyle can be attractive to some.

For example, Big Eyes, the 2014 movie was about a man who was in love with the image of being an artist. He preferred the idea of being an artist rather than actually creating art. He also found that it was an easy way to  con people too.

However, these are not the reasons that I make art. I make art because I have to. My one artistic skill is working with fabric and yarn. I know how to sew and quilt. Drawing and painting are not my strengths.

On Calling Yourself an Artist, blue and grey abstract art quilt
Between Showers
25″ x 20″ 63cm x 51cm

A Negative Stereotype

On the negative side, the general impression of artists is that they are moody and difficult to get along with.Their  spontaneity makes them completely unpredictable. Their lives are disorganized to the point of total confusion. I ran into former colleague who used to paint. I asked her if she was still painting. She said, “No. I am happy now. Only unhappy tormented people paint.” Sadly, this person had something to give the world as a painter. Hopefully, this stereotype is changing. While society needs artists, artists also  need to people that are approachable and reasonable to work with.

The Pressure

After college graduation when  I was beginning to make my way in the world, I would tell people. I am a writer. When they asked what do you write? We would answer, I write checks. Somehow this deflected the weight of trying to live up to an image and responsibility of being a producing writer.

Furthermore the same pressure weighs on artist’s too. If I call myself  an artist then I must be making art. I must be putting on shows. Art should be flying out the window. It should be my full time job.

People  with art degrees feel even more pressure. They studied and worked hard to learn about art. However, a common complaint is that the schools  teach them to make art. But they don’t teach them how to take their art to the next level and to sell their art. This pressure weighs heavy on some people.

In spite of these stereotypes, all humans can and need to create beauty. We do it in different ways. Cooking food, gardening dressing and decorating our houses. and in many ways.

Light in the Forest
42″ x 40″ 106cm x 102cm

Growing into a new Profession

It takes a while to grow in  to any new profession. We work hard to get qualified. Then we try and find a  position in our field. Yet it often takes time before we feel the title fits who we are.. Who truly felt comfortable their first year or years in a new position? Looking back probably not many of us. With my first born I  felt like a mother for the first time not when she was born. It was weeks later when I was able to calm her down  when she was fussing in her crib. We need to give ourselves time to grow into our new positions. Adding layers of expectations and stress is not helpful. Now after 10 years saying that I am an artist is becoming easier.

https://annbaldwinmayartquilts.com/2020/04/forging-your-own-art-path/

https://annbaldwinmayartquilts.com/2018/11/sources-of-ones-creativity/

All art quilts shown in this post sold. You may find more at my etsy shop. https://www.etsy.com/shop/annbmayartquilts/

 Good Advice Gone Bad

Here are some examples where good advice went bad. Or in other words the advice did not work out for me.

Good Advice Gone Bad Anna’s Irish Tulips, a king sized bed quilt

Several years ago I completed that queen sized bed quilt. Charming tulips with leaves popping out from the sides alternated plain cream colored blocks.  In the empty blocks I hand quilted flowers. I made a scalloped hem knowing that this would truly be a family heirloom. Needlessto say, I was extremely proud of my work. After all,I had been quilting for years. This was the culmination of all my work.

Good Advice Gone Bad

While I was proud of my work, the appraiser gave the quilt a very low appraisal for a queen size bed quilt with some handstitching. In 2005, $350 was a low appraisal. Disappointment reigned. Yet over the years, what a lot of money I saved. I have a large inventory. What if I had had all of them appraised?

Forest Fires of 2020

Most importantly, our county did suffer horrible forest fires in 2020. Many people did lose their homes. Our home was close to the fires.  No mandatory evacuation was ordered. Nevertheless I self evacuated myself to a friend’s house in south county for four days. I moved precious items to my studio downtown where they would be safe. None of them were quilts. Some of my quilts were already in my studio.

A few years ago I began to have success. Consequently, I wanted my quilts to be photographed professionally. So I asked a well known quilt artist for a local recommendation. She told of a man who had photographed quilts for a museum. Meanwhile,I called him up. His prices were based on the size of the quilt. They were in my price range. Therefore, I made an appointment to drop the quilts off at his studio 25 miles away.

As it turned out, the photographs were terrible. The colors were not even correct. Isn’t that our least requirement that the colors to be right? So I took my own photos. The results satisfied me.

What did I learn? Of course,each person may come to their own conclusions. My thoughts are to trust myself. Furthermore,digital cameras have improved so much in recent years. Therefore, I can take my own photos. First of all, I am proud of the family heirloom that I created. Above all,listen to yourself. Believe in yourself. Keep going. Do not be deterred by negative comments. Most importantly, it is what happens to you but how you react to it.

https://saqanorcalnv.com/

http://saqa.com

Do you Look at the World with a Critical Eye?

Seeing Critically

Seeing critically is looking to see what one likes or doesn’t like about something. How would one make it better or more attractive? Don’t we all do this while getting dressed? However, it could also pertain to a piece of art, an room arrangement or a garden as well as  others.

Seeing  Critically
What would you add?

An Exercise to Practice Seeing Critically

Lately, I have found my art process spilling over into other aspects of my life. Basically my process is to do something and then try and make it better. What can I do to make the art more interesting? How can I kick it up a notch? I find myself looking at others work and doing the same thing. What parts do I like and which parts would I change? I am not being  critical as in criticize but as in finding the merits and the faults of something.

I see this as seeing and thinking critically about the work. The thoughts are only for myself. I wouldn’t dare say anything to the artist. That is not my intent. It is merely a practicing looking with a critical eye.

The Learning Curve of Art

I am reminded of an exercise that a photography teacher had us do. We were to go about our lives without our cameras and look for photos to take only with our eyes. The students practiced forming low risk pictures. We would notice the world around us. Frame a shot, pretend to take a photo  and continue on our way. It was a way of focussing. It was also in the days of dark rooms and fairly  expensive film. However, the exercise is still a valid one to focus one’s eye to the beauty around us.

Maybe this is a common art teacher technique. Never having much art training , I don’t know. My one year of drawing and painting was back in the days of Do Your Thing. If you know what your own thing is then that is great. But I had no idea of what my thing was.

I took the photography class because I had noticed that people with a good camera could get into events more easily. People thought that you were with the press.

Trying new ventures is a good idea. However to attain a particular skill level, one must practice. Somehow that never occurred with me.We are all in different places along the learning curve of art.

Seeing  Critically
How would you use this pieces?

Artful Gardens

Many people take pride in their artful gardens, large or small. As I walk by a neighborhood garden, I find myself observing critically. How are the plants  arranged. Are the shapes, colors, sizes of the plantings in harmony? Are they placed in a balanced way? Or are they clumped together with no interest? Between the drought, gophers and deer,we are sometimes lucky to have anything growing this late summer.Critisizing in not my intent. However, looking for artful placement of colorful plants is.

Art on Social Media -Seeing Critically

These days many  people are posting their art on social media. Each person is on their personal pathway to becoming or improving as an artist. I would never make a critical comment about that  person’s art. But it is an opportunity to practice seeing critically.   What parts I think work and how I might change it if it were my piece?

In conclusion, becoming an artist takes practice. Part of that progress  is to see critically many different art forms or even parts of life.Try it! It is free and easy. However, it is best to keep your opinions to yourself!

Read more.

https://annbaldwinmayartquilts.com/2022/02/one-fabric-three-art-quilts/

https://annbaldwinmayartquilts.com/2022/08/how-to-talk-to-the-public-about-your-art/

https://annbaldwinmayartquilts.com/2020/04/forging-your-own-art-path/

https://annbaldwinmayartquilts.com/2019/09/becoming-more-creative/

https://annbaldwinmayartquilts.com/2020/06/develop-your-art-style/

https://www.etsy.com/shop/annbmayartquilts/

What is Art in a Box or Assemblage?

Orange Key

Art in a Box or Assemblage

Cityscape   9" x 7", art in a box, wall paper and cement tiles
Cityscape 9″ x 7″

3D Collage

Assemblage is like a 3D collage usually with found objects. It is a 20th century art form that became more well known in the 1950s and 1960s. Art in a box is a type of assemblage.

Small Wooden Boxes

I recently found about fifteen 9″ x 7″ 23cm x 18cm wooden boxes. They were brand new, in light shades of grey and beige. A perfect setting for some assemblage. The box works as a frame. My mininalist style worked because there wasn’t room for much more. A chance to finally structure add some continuity to my displays. https://annbaldwinmayartquilts.com/product/cityscape-found-object-art/

A Class in Assemblage

In 2018 I took a class in assemblage from local artist, Janet Silverglate. https://www.janetsilverglate.com/

Big Brown Button  8" x 10" concentric circles of brown and green on a fiber background
Big Brown Button 8″ x 10″ My piece from the class

First,she taught the class how to use a drill with wood or metal. Meanwhile,the students created a layered piece from a wide range of available materials.

Interestingly enough, Janet also came from the sewing world. Furthermore,she built on those skills while changing her materials from fabric to metal. She encouraged me to adapt my known skills as well to the different materials. Janet was incredibly generous with the materials that she had collected. However, I still had a lot to learn about the art form.

Altar at the Top   9" x 7", art in a box, gray cement tiles and brown glass tiles
Altar at the Top 9″ x 7″

https://www.etsy.com/listing/1005720871/contemporary-mixed-media-collagebeige

Choosing a Background

One of these adapted sewing design skill includes starting with an interesting background. I chose redirected wall paper that would add movement, color or texture to a piece. My usual way of working is to first select interesting materials I like. I have no idea of what project I may use them for. For example, I let the materials play with one another. They tell me if they want to be together or not. Sometimes the size and scale is not correct. Other times the colors are slightly off. At times even great materials need to be saved for a different project .

Orange Key,9" x 7" Repurposed gift box has an antique key hanging against orange background. 1/2" tiles add interest.
Orange Key,9″ x 7″ This box came to me as a gift box.

Choosing Materials

I prefer to see the materials in front of me before making a choice. There are just too many variations involved for me to choose. Color? Are the colors of the correct shade or hue? Too grey or too beige? Scale? Is the size correct for the box? Is the action on the wallpaper too big or too small for the box? A perfectly lovely item may need to be saved for a different art piece. Scale is an important element when working small. The quarter inch tiles I redirected from a interior designer fit the tiny bill. Each miniature tile has a slightly different shade of color to it. I couldn’t place them correctly without seeing them first.


Three Keys   9" x 7" Found objects like keys add interest. minimalist art in a box
Three Keys 9″ x 7″ Found objects like keys add interest.

https://www.etsy.com/listing/1005714869/contemporary-mixed-media

Color

The color range of the tiles was limited. Yet a few tiles provided tiny pops of color. Luckily, the tints complimented the muted shades of the container boxes. In addition, finding a unique artful use for a redirected item is definitely a win-win for the earth.

Texture

Texture adds depth to a piece. Fiberous materials also add interest. The 3 dimensional aspect draws the viewer closer. However, that could just be my special view on fiber. Interesting, vintage items also provide texture. “Junk” laying around one’s house can be put to good use. Surprise yourself!

In Conclusion

In conclusion, artists stretch their artistic muscles by learning new skills. Combining shapes, forms, and colors are basic skills that can be developed. After that, those skills are available for and can be applied to many art genres. For example, I recently witnessed a flower arranger combine various colors,textures and sizes to create an incredible bouquet. Everyone starts somewhere. Just start!

Read more.

https://annbaldwinmayartquilts.com/2021/02/recent-attempts-at-assemblage/

https://annbaldwinmayartquilts.com/2021/01/first-steps-towards-assemblage/

https://annbaldwinmayartquilts.com/2021/07/art-materials-hard-or-soft/

https://annbaldwinmayartquilts.com/2021/08/sewing-room-minimalist-assemblage/

https://www.etsy.com/shop/annbmayartquilts/

https://annbaldwinmayartquilts.com/videos-of-art-quilts/assemblage-video-work-in-progress/

How to Turn your Antique Sewing Objects into Art

  Sewing Room Assemblage Art

Sewing Room Minimalist Assemblage
large plastic sewing kit, 15″ diameter

 Sewing Room Assemblage may just be another name for a mess of sewing room items.I inherited those sewing items that I now wanted to use in my assemblage pieces. Think of assemblage  as a three dimensional collage.  My mother and mother-in-law were part of the generation that grew up in the Great Depression. They married before World War II. Their families started after the war in the 1950s.

A Generation Expected to Sew

Like  many of their generation, sewing skills were expected. Neither my mother or mother -in-law were expert sewists. It has been   over twenty years since I acquired all of their sewing supplies. This included special pieces of furniture to store the sewing items as well as numerous threads,needles pins, measuring tapes, thimbles and gadgets. Some of the items are recognizable to the 21st century sewists and some aren’t.

Sewing Room Minimalist Assemblage, wooden spools in a thread tray some empty and some still with thread
Thread Tray

A New Use for the Thread Tray

A piece of furniture especially made to store sewing items had seen better days. Yet, I kept the wooden tray for thread storage. That piece became the frame for my whimsical piece with thread and small animals that I had been saving. I lined the larger left side with a piece of fiber and added a necklace. The details of buttons lay on a coral  felted piece a friend gave me. The most unusual item is the wooden needle case in the middle of the third row. The wooden spools add charm but I couldn’t resist adding some color with some that still had thread.

Sewing Room Minimalist Assemblage
Spool Wreath

Spool Wreath

I do a lot of sewing. Needless to say I had many empty wooden spools.  I generally don’t throw anything away. For several months,I kept my eye out for a way to use these spools. I finally saw a wreath on a door. It inspired me to consider making a wreath with my spools. After much thought, I decided to string  the spools on a dowel. I added red wooden beads in between. I had to experiment with the width of the dowel. The 1/4″ .5cm wide dowel was wide enough to fit the hole of the spool and strong enough to stay straight.

Other Parts of the Wreath

Other parts of the wreath used found objects like the clipon metal hanger and the fiber paper plate holder for the base. The burlap bow was reused from a gift I had received. I prefer a  minimalist assemblage style for my sewing room pieces.

Mistakes can be Good.

The shorter length rays were a mistake.  I used a 1/8″dowel that proved too  weak to hold the spools straight. The dowel broke. Instead of throwing the weak dowel out, I choose to shorten the length of the arm. I think it worked. Mistakes can add  interest although unplanned. https://annbaldwinmayartquilts.com/2018/11/mistakes-that-i-have-not-regretted/

Sew Fun, 8" x 8" mixed media with small sewing items on a wooden grid
Sew Fun, 8″ x 8″

Sew Fun

This sewing room minimalist assemblage piece,Sew Fun includes some of the more unique sewing items. I started with a wooden grid for design interest.The heart shaped item’s original use was to store pins and large needles. The three dimensional shape has a 1/4″ space between the two hearts for that purpose. The long wooden spool on the bottom originally was covered with thread. An orange packet of needles and an orange pair of scissors adds a needed bit of color.

A Metal Bobbin

I learned to sew on my mom’s Singer sewing machine with metal bobbins. The bobbin is an essential piece holds the bottom thread.  That machine is long gone. Yet, I found  a metal bobbin with orange thread  on it. An orange color scheme was devloping. Some may recognize the small metal threader in the middle. I believe that these are still available for sale. They presumably help people thread small needles although I never mastered that skill. An orange batik ribbon for hanging completes the piece.

Sewing Room Minimalist Assemblage
Red,White and Black Treasures, 8″ x 8″

Red,White and Black Treasures

The red,white and black treasures of thread were originally part of a small sewing kit my daughter bought in Germany. I lined the box with a thin piece of cork. Another long empty spool from the American Thread Company was  added. I included the paper instructions for Muriel’s Yarn Threader price 75 cents. Who doesn’t have a lot of buttons? I created  details with two levels of buttons in alternating colors. Black ceramic tiles finished the corners.

Brown European Threads 8″ x 8″

Brown European Threads

For the Brown European Threads Minimalist Assemblage, I used the bottom part of a lidded box. See the little bit of the hinge on the left. I couldn’t remove it so I just left it. I lined the box with a piece of redirected wall paper. There were several more European threads in the brown muted color range. A packet of Boye Needle Company from Chicago takes center stage. This is the type of packet that I saw many times in my youth. This time I placed the double decker buttons on  small cream colored tiles.

Art in a box green, yellow blue spools of threads with multilayered buttons on blue tiles
Blue European Threads 8″ x 6″

Blue European Threads

Another  variation of the sewing room minimalist assemblage is Blue European Threads. I used wallpaper for lining. I made double decker buttons with blue, green and yellow that match the European spools of thread.  Some matching shiny round objects to offset the spools. Blue and green buttons are placed on blue tiles to accent the corners.

Conclusion

Sewing Room Minimalist Assemblage can take many forms. So take a new look at the items that you have around your home. You don’t have any?  Search for unique items at garage sales or second hand stores.  You can give a new artful life to the common sewing items from the 20th century.

https://annbaldwinmayartquilts.com/2021/03/beginning-steps-to-creating/

https://annbaldwinmayartquilts.com/2021/02/recent-attempts-at-assemblage/

https://annbaldwinmayartquilts.com/2021/09/art-in-a-box-assemblage/

https://www.etsy.com/shop/annbmayartquilts/

When Why How to Quilt?

Smilin',33" x 24",2021, all silk

  When Why How to Quilt?

What is quilting? Quilting can be several things. A basic definition is the sewing together of two or three layers of fabric either for a practical purpose or a solely artistic purpose. What if  a person cuts up fabric and sews it back together to make the top of a bed covering? Yes is the answer.

Who is a Quilter?

Are you a quilter if you only sew or piece the top together and then have another person do the quilting? Yes. When I started, I only did that part. I worried that I could not call myself a quilter when I really only pieced the top together.  Another person quilted the three layers, the top, the batting and the back, together. It turns out that I was wrong. Even back then,I was a quilter.

Acceptance of Many

The quilting world and the art quilt world both accept  people as quilters whether or not they actually sew the three layers together. Some have the luxury of sending their tops to a  person with a long arm machine or another person to complete that part of the process. Let’s just make sure that they are given credit for their contribution.Words are funny that way, confusing at times and not even close to the reality. No wonder there is so much misunderstanding in the world.

When Why How to Quilt?
Poppin’ Back, 23″ x 22″

How to Complete

I recently completed two abstract art pieces. Poppin’Back used bright yellows, purples,magentas contrasting with white pieces of fabric. The fabrics were cotton. When it was time to sew  the three layers together, I didn’t stop to think. I forged ahead, quilting the usual way I often do, moving the quilt from side to side to create wavy lines . This creates another level of movement that I adds to the art piece.

When Why How to Quilt?
Smilin’ 33″ x 24″

The Second Piece

The second piece,Smilin’  was completely made from dipioni silk in bright contrasting colors with curved line piecing.I loved the bright colors and shapes. What would quilting lines add to the stunning colors? I decided that they wouldn’t add much.

Yet, the 3 layers layers of fabric needed to be attached. Stitching in the Ditch which means quilting in the seams solved the issue for me.  Many art quilters would expertly sew 1/4″ lines to fill spaces. Giving myself permission to do something differently,I listened to what I felt the piece needed. I am happy with the final product.

Conclusion

Consider what is quilting brings to an art piece? Does it add an important  element like movement or color to the piece? Is it necessary? Each art piece is unique. It deserves its own consideration on how to quilt it. These are decisions that only the artist can make. It is one of the artistic decisions that the  artists must make. My plan is to pay attention and listen to the art more in the future.

See more art quilts at the Studio Art Quilt Associates’ website. https://www.saqa.com/

https://annbaldwinmayartquilts.com/2021/02/the-making-of-an-abstract-quilt/

https://annbaldwinmayartquilts.com/2021/06/abstract-art-in-fabric/

quilts/https://annbaldwinmayartquilts.com/2020/01/creating-movement-in-abstract-art-quilts/

https://www.etsy.com/shop/annbmayartquilts/

How to Choose Between Hard or Soft Art Materials

Paddling Along, 10" x 3.5"
Art Materials: Hard or Soft, art in a box with cement tiles and green glass tiles
Green Sphere 9″ x 7″

               Art   Materials:  Hard or Soft

An acquaintance  who follows my work on Instagram recently commented on the progress of my work into hard materials. The comment stopped me in my tracks. What? It made me think. For me, moving into assemblage was something that I had been doing for a while at a very slow pace. Assemblage is a 3D collage generally of diverse found objects.Yes, fabric art quilts are soft and generaly 3D materials are hard. Yet, I hadn’t thought about it that way.

3D Found Materials

As an art quilter I had often added 3D found objects to my work. Whimsical toy soldiers, artificial flowers, pieces of jewelry are just a few examples. Seeing it from another’s view made me take a second look at what I was doing. Larger tile pieces would be too heavy to work with.As a result, I had chosen quarter inch tiles and other objects mainly due to their size and color.

Inspiration

I draw inspiration from the materials and how they play together. I gather materials without thinking about how I will use them. This process applies to  the hard or soft art materials that I work with.  My sources are redirected sample designer materials. If the small slate-like samples had not been available, I wouldn’t have searched for them. On the other hand, I wouldn’t have even known that they existed.

Materials Front and Center

In the past, I  have spent time looking for the perfect piece of fabric for a project. It was frustrating and time consuming. Moreover, the results were often disappointing. I discovered that my imagined perfect fabric didn’t always perform as perfectly as I had expected. Working with what is in front of me proved more creative, artistic and satisfying.

On the other hand, a shopping situation with distractions galore overwhelms me.  With the materials front and center, I can quickly see that the scale or color either did or didn’t work. This proves more fun anyway even allowing serendippity to happen. Materials,however, fabulous don’t always work for  every project. Save them for another  project.

Tower in City 9″ x 7″

Color! Texture! Movement!

My mantra is Color! Texture! Movement! That is what I want the viewer to take away from my art quilts. Changing to hard materials didn’t fundamentally change that for me.  I do admit it might look differently from the outside or to a viewer on a tiny screen.

The whole concept of choosing hard or soft art materials did not cross my mind. Even though some materials are obviously heavier and harder than others. I selected the background wallpaper to build action and  color into the piece. Slight variations of colors in the pieces of concrete flow.  Variations of  width of the materials add depth.

Scale

The size of the project and time involved encouraged me to widen my artistic scope. Scale followed quickly. One cannot make smaller items without being aware of scale. True confessions time- I wanted some projects with a lower price point. Even small quilts involve time consuming hand work. Yet,smaller doesn’t always mean less time involved in the creation. Depending on the materials at hand,working with a smaller scale can negatively affect the time spend on designing.

People see Things Differently

I appreciate getting insight into how others view my work. The hard and soft comment opened my mind. Some comments from people I take more seriously than others.A comment from an experienced quilt artist would catch my atttention. However, I generally ignore some  comments.  A gentleman once commented that a piece reminded him of a particular place. I listened and even googled that location.Yet, that place had  not been  my inspiration. While  I was willing to listen,  I was not too concerned.  People see things differently. They bring their own experiences to how they view a piece.

Start at the End, Sometimes

Some of my fiber artist friends are extremely  talented. One in particular would use unusual found objects to create incredibly engaging art pieces. Yet when she was finished she didn’t know how to hang or best display her large 3D work. So I decided that I would consider how to display the work before I got started.  With these assemblage pieces I attached a hook first.Then I continued designing the piece. Working backwards is new process for me.

Art Materials: Hard or Soft
Cityscape, 9″ x 7″

A Unifying Look

Early in my creative process I acquired twelve identical wooden boxes of varying pale colors. That was a good start for me. Usually I never consider how a piece will look next to another piece. This gave me a chance to unify my look. Some assemblage pieces can be hung and some can sit on a shelf or table.

So I start with a frame or wooden box. Then I add a hook to hang it on. Next,I search for wall paper that complements the box color . With luck it adds texture. Because I am new to this process, I want to know where I will end  before I permanently attaching the paper. This may change as I gain more experience. The viewer doesn’t know what the artist began with and how they might have added or subtracted from what was there.

Art Materials: Hard or Soft
What Do You See? 12″ x 7″

Metal or Wood

Assemblage artists generally  choose materials from wood and metal. Personally my preference is wood. Metal just doesn’t speak to me in the same way. In the class I took I learned how to use an electric drill to make holes in metal or other objects. I still have  my childhood skates that attached to my saddle shoes.  I would love to use them in a piece.  Several times I have tried to see what might work with the skates with no success. As much as I love them, I will save them for a later date.

In Conclusion

In conclusion, it is not about the   materials  being hard or soft. It is the color, texture and movement of the surface that inspires this artist to create something new and hopefully exciting. How will you push yourself to try something new? Do your materials inspire you to move to your next level?https://annbaldwinmayartquilts.com/2021/03/beginning-steps-to-creating/

These pieces of assemblage are available at my etsy shop.

https://www.etsy.com/shop/annbmayartquilts/

You may be interested in reading more about assemblage.

https://annbaldwinmayartquilts.com/2021/05/paper-as-art-material/

https://annbaldwinmayartquilts.com/2021/02/recent-attempts-at-assemblage/

https://annbaldwinmayartquilts.com/2021/01/first-steps-towards-assemblage/

https://annbaldwinmayartquilts.com/videos-of-art-quilts/art-quilt-video-2-continues/

https://annbaldwinmayartquilts.com/2021/09/art-in-a-box-assemblage/

A New Art Direction for My Art-Follow my Path

Green and Orange Grid, 6" x 24"

Paper As Art Material

paper as art material

Paper as an art material is a new use for me. I usually cut fabric. A while ago, a visitor watching me cutting a tree out of fabric,  he commented that it reminded him of a friend who does paper collages. While collecting materials for my new direction, mixed media assemblage, I acquired some used frames. I didn’t pay attention that some frames had glass and some didn’t. Yet, I soon realized glass doesn’t work with 3 D objects. So paper collage it was.

A New Art Direction using Paper

paper as art material

Paper Collage

I hadn’t really used paper as art material in my recent history.Yet, I found the process very similar to what I had done with my fabric layering techniques.Although I  cut fabric instead of paper, it was the same process.  The larger pieces go down first. Then I add the smaller pieces.I  like using a long thin skewer or similar tool to gently move small pieces carefully.

Because this process was new to me, I made a sample. I photographed it to remember. Afterwards,I took it apart and began gluing. First, I glued the largest pieces. Then  I added the smaller pieces. My go-to tool is a large pin to add glue under small spaces. It is the easiest tool I have found to glue in tiny globs.

My Motivation

Recently I have been trying some new assemblage techniques.  I needed  to make smaller pieces that would take less time to make and sell at a lower price point. The plan was to use items that I already had in my home and studio. Interesting pieces of discontinued wallpaper came my way and inspired me to use the paper as art material.

paper as art material

Using a Frame

I  began with a frame or wooden box. Oddly enough for an artist,I had never used frames before. My art quilts are finished with a facing on the edges. There is  no need of a frame. Probably the normal way of making art is to create something and then get it framed.

However,I worked the opposite way. I found a gently used frame or a shallow box. The art was based on what I had that would fit inside.I  matched the colors of the frame.  Style,size,scale and color guided me.

A  Surprise

Working with new materials I wasn’t quite sure what to expect. A piece of plastic inside a frame had words on it that I wanted to remove. I figured that it was a decal. I laid it down and poured vinegar on it.    After 30 minutes, the decal could easly be removed with a bit of rubbing.  However, the rest of the liquid had disappeared. Where did it go? It was not on the drainboard. The liquid seeped into the plastic lining. I had to dry it several times as I turned it on its side and the liquid came out. Just a bit of an unexpected surprise!

Reusing and Reducing materials

Reusing and reducing materials is a  great motivation for me. These materials were new to me. Wood, fabric,redirected tile samples and paper speak to me more that metal or plastic. I have used some small metal items. The paper I used was discontinued wallpaper samples.

paper as art material
Grasslands, 5″ x 4″

An Independent Study -A New Art Direction using Paper

In my college years, I completed several independent studies. The process was a familiar one to me. The self directed student chooses a topic or project. They dive into finding information or trying new techniques. The student finishes by creating a new project. As I was creating different assemblage with the found items,I realized that I had basically created  an independent study for myself. No classroom credit awarded of course.

In Conclusion

It is such a joy and welcome distraction for me in these times of the pandemic to find this next direction for my art. This new direction is totally unexpected. My creative juices have been replenished.

More reading that you may find interesting.https://www.annbaldwinmayartquilts.com/2021/01/first-steps-towards-assemblage/

https://www.annbaldwinmayartquilts.com/2021/02/recent-attempts-at-assemblage/

https://www.etsy.com/shop/annbmayartquilts/

African Fabrics in Art Quilts

African Fabrics in Art Quilts

My art quilts are all about Color! Texture! and Movement! Inclucivity and respect are important themes that motivate me. It is no wonder that  African fabrics embody my vision. The contribution of the African fabric to the fabric world is undisputed.

My Earlier  Art Quilts

Travel Enriches
Travel Enriches, 2009

Travel Enriches is one of my earlier quilts. In our early thirties, my husband and I were able take a year traveling around Europe. We encountered people from the world over.We met people from Africa, the Middle Eastern and Asia as well as Europeans. For me traveling is not only about taking in the famous sights. It is about learning how other cultures think and live.  This art quilt celebrates the brotherhood of man.

African Crabs,
African Crabs, 26″ x26″ $1500. fabric art quilt,2010

African Crabs continues in this same vein bringing together divergent fabrics from around the world in this fabric collage. Even in my early pieces,   I  added 3D pieces of found jewelery or items.  An adventure in color for the brave.

Together,We All Win, 50″ h x 33″ w, 2010

I created Together, We All Win for a show with a theme of games. My family was obsessed with football. Of course I thought of the arm action meaning touchdown! The title has a double  meaning two things.To win a game, the team  needs to work together.   The world is a better place when we all work together.  Bright and varied African and international inspired fabrics create the body.

Later Works with African Fabrics

African Abstract, 15″ x 12″, 2016

African Abstract began with the deep red and green fabric in the center of the piece. It was a challenge to find colors that coordinated with it. Serendippity happened when the fabrics had circles and dots on them. Several bone beads hand sewn on continue the movement.

African Woman,15″ x 15″, 2016

https://annbaldwinmayartquilts.com/product/african-woman-art-quilt/

Under the Savannah Shade using African fabrics
Under the Savannah Shade using a mix of African fabrics and other fabrics, 33 ” x 38″, 2017

Under the Savannah Shade has vibrant oranges, greens and yellows. Decorative threads are zigzagged onto fabric and then cut apart for texture.  Quilting with swervy lines from one side of the art quilt to the other adds movement.

In Conclusion

African fabrics bring a unique combination of color, joy, and movement to the textile world. Honor the black experiences by using them in your art quilts.

https://www.etsy.com/shop/annbmayartquilts/

Black Lives Matter

There are several shops on Etsy selling African fabrics.

Here is one.

https://www.etsy.com/shop/kame79

Learning more about African Fabrics

Information is provided by Kitenge a fabric and tailor shop in London.

Did you know that African print fabric (commonly known as ‘Ankara’ in West Africa and ‘Kitenge’ in East Africa) were first produced in Indonesia? As early as the 1800s,West African soldiers serving in Indonesia started to import the fabrics into Africa. Later, European traders replicated the fabrics using modern machinery, particularly the Dutch who are one of the main producers of the fabrics today.

Have you discovered African wax print clothing and would like to learn more? Or would you like to know more about the current market and what is causing African textile mills to close?

Continue reading to find out how you can help support the African textile industry…

Method

The method of producing African wax print fabric is called batik, which is an ancient art form. Melted wax creates designs printed onto the cloth. Then the dye is applied usually using  2 or 3 colors. The wax-resist dyeing technique and special machinery  creates the famous crackling effect.

Features & Benefits

The 100% cotton, colourful cloth keeps you cool in hot climates and warm in cold climates. The vibrant and bold anakara fabric prints are fun to wear and make you feel good.

Wearing modern African print clothing can make you stand out in the crowd. Be unique, be different and add some colour to your life!

Hidden Meanings

Tribal patterns and motifs of the wax print fabrics identify each unique African culture . Each design and colour can reflect local traditions and symbols such as the group, marriage and social status of the wearer. Some African women use them as a non-verbal way of communication.

A typical African print fabric shop at a market in Tanzania, East Africa

Current Market 

Sadly, several remaining African textile mills are closing and skilled, local workers are losing their jobs. The main reason being that they simply cannot compete with the cheap Asian imports from countries including China and India sold at nearly half the price!

Counterfeit Fabrics over Originals

Locals are purchasing ‘fake’ counterfeit fabrics over ‘original’ African (or European) produced fabrics because of the price difference, which is understandable due to the current economic climate. The original fabrics are usually sought after for special occasions.

The counterfeit fabrics claim they are made in an African or European country on the selvedge! Yet, sadly the trademarks and logos are  false.

Quality and Colourfastness

However, the quality and colourfastness of the counterfeit fabrics are inferior to the European and West African produced fabrics. It takes the Chinese 1 to 3 months to copy a new design so speed to market is key for the African and European textile mills to differentiate themselves and compete.

African Governments

African Governments should do more to stop the importation of counterfeit wax print fabrics from Asia before it is too late. Otherwise, the designs of African textile mills will continue to be copied and exploited and the local industry will continue to suffer.

Support Small Businesses

Small businesses like us play our part in supporting the African textile industry by producing high quality, African Wax Print Clothing locally using original fabrics that are made to last.

“The customer feedback we have received about our fabrics overall has been very positive and is one of the main reasons behind our success” (Sian, Kitenge Founder)

Ankara Fabrics

Ankara fabrics are easy to fall in love with due to their bright colours and unique designs. Modern afrocentric clothing designs are stylish and fun to wear. Go bolder as it could transform your life (and your wardrobe). Take a look at our latest Ankara styles.

Please help to share this post on social media to show your support for the African textile industry. Raising awareness of the current market situation is really important for its chance of survival.

https://artsandculture.google.com/exhibit/the-fabric-of-africa/xwISIFA_fBjSIA

<1001centerstreetsantacruzca>